Last Updated on January 17, 2023
So, you want to know how to use a router table but unsure where to begin? Well, you aren’t alone in thinking that, but the good news is that router tables are not as difficult to understand as you may have initially feared.
With that in mind, here’s a simple guide to a router table.
By the end of it all, you are going to be an expert.
What Is a Router Table?
First, let’s begin by checking out router tables in general.
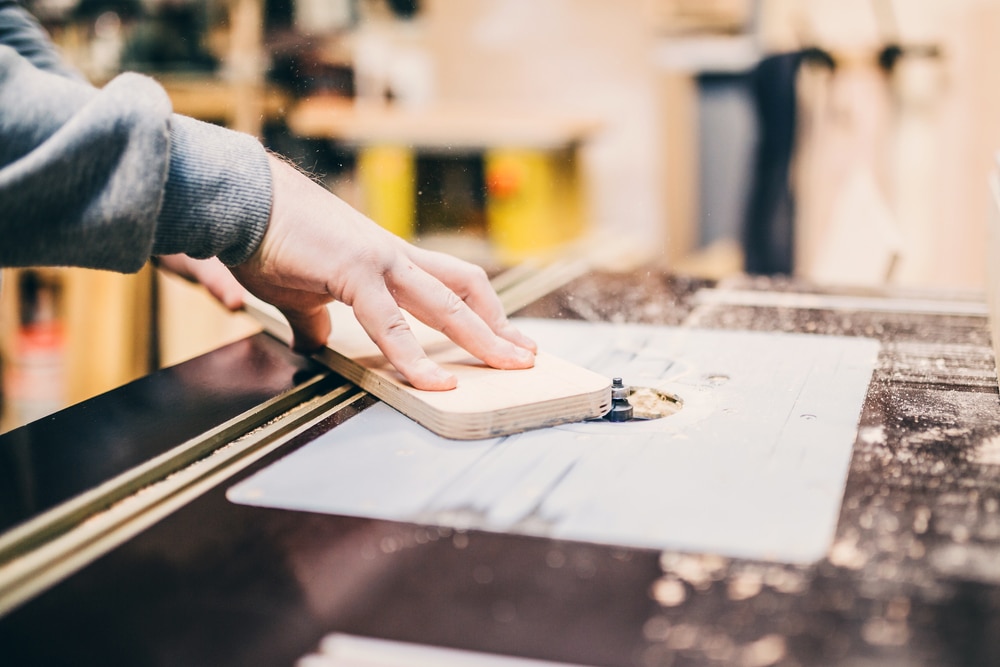
Basically, what you have here is a stationary woodworking machine that provides you with the ability to carry out some routing on wood safely and in the next to no time. You do this by using a router bit that sits up out of the table. A fence is used for you to press the wood against as you guide it across the table.
This table is quick and easy to use. It’s suitable for various projects, and that’s why it’s so popular with woodworkers around the world.
Potential Projects for a Router Table
Examples of projects you may wish to use a router table include:
- Working with longer than normal stock.
- Working with small stock that isn’t easy to work with via handheld routers.
- Creating raised panel doors.
- Creating an edge on wood.
- Creating grooves.
- Making finger joints.
- Making dovetail joints.
- Creating stop cuts.
The list goes on forever, but this brief list indicates what’s possible. It’s up to you to decide on the woodworking project that you wish to work on.
Choosing a Router Table
So, how do you choose the correct router table? Well, you have several points to consider before you go and splash out your cash.
First, don’t focus too much on having the appropriate bit. You will want to get numerous sizes, as one bit will only do a limited number of jobs.
You want to check that the top surface is flat on your router table. It should also be easy to adjust the table to make sure it’s at the right height for you. Check the material that the router table is manufactured from, as you need it to be sturdy. After all, some scrap wood can be large. If your table isn’t steady from the outset, then large panels will make it topple.
Don’t Forget the Fence
Pay close attention to the fence that comes with the table. The fence is a vertical item that can be applied and adjusted to suit your needs. The router bit will also protrude from the fence, but it’s such an integral part of these tables that you must make sure that the fences can move when required.
There can be a slight difference between various brands, and you have some basic needs that need to be covered when you go to your local DIY store. If in any doubt, ask for advice according to the projects you have in mind.
Lihat postingan ini di Instagram
How to Set Up Your Router Table
Let’s say you have completed your search for a router table, and you are content with the bit you have lined up for dealing with those boards, that panel door, or whatever you plan to work on. Now, how do you set up your router table?
Well, we are going to look at not only freestanding router tables but also the tabletop version.
Give Yourself Room
In the case of both, you need to make sure nothing else is in your way. Items like sheets of medium density fiberboard are large and cumbersome. You need space to deal with them, especially with shaping cuts.
Give yourself space, and then you need to erect the table, and exactly how this is done will depend on the type of table you own. However, make sure it’s stable, as one of the worst things you can do is have an uneven router, which will impact even on cuts you make and could potentially ruin the item.
After the Assembly
If you have now assembled the router table, you then need to look at incorporating the router. It will involve base plates, along with installing the fences and router bit. It may sound like a lot, but it’s easier than most expect.
A Quick Point About the Router
You need to install your router into the base of the table. It comes through the base plate and is held in place. It’s then simple to install the correct bit according to the project you have in store.
The aim here is your hands will be free from holding the router, allowing you to have better control over the wood.
Setting up the Router
If you already own a router, you will also have the router bit, making life easier. You will also already know how changing bit alters the result you achieve. Well, you can still get those same results when using router tables.
To change the bit, you use the same approach as you would with your handheld router. It does not change just because you are using a router table.
But there’s another aspect to consider, and that’s the fence.
Setting up the Fence
The fence is the verticle piece you see sitting on the router table. It partly acts as a guide, while it also offers you a secure surface for the wood to rest against.
The fence aims to create a sense of resistance and something to rest the edge of the panel door against or whatever item you are dealing with when working on it.
It provides you with a stable base, and then the router bit sticks through the fence. You push the pieces along against the router table fence while the bit does its job of creating the moulding or producing that edge.
The fence sits along a designated line on the table. It’s firmly fixed down, but it can be adjusted depending on the router table in question. One quick point, you don’t need to take out a combination square to make sure the fence itself is square. It’s designed to give a straight edge, and it will be like that by default, even if the fence is skew to the table.
Using Your Router Table
Using a router table is easy. You can adjust the height of the bit, as well as the bit piece itself. Move the router bit depending on the size and depth of the edge or how deep you want the raised panel to be.
Next, you need to understand how to create the edge or whatever you plan on doing. Understanding the correct technique will make life easier to explain how to carry out a few simple cuts or edges.
Working With Strange Sized Stock
To work with strange sized stock, then safety must be your primary concern. Consider using feather boards to hold the stock in place against both the fence and the bit.
Doing this allows you to concentrate on the feed rate, and controlling the feed rate will eliminate the chances of the bit effectively burning the wood. All that’s required is to feed the stock and the table with you to achieve your desired end result according to the bit you have installed.
Creating a Stop Cut
Cutting wood on a router is easy, thanks to various possible techniques with this type of machinery. A stop cut is when it does not go the whole length of the boards or stock. It is something easy to do when you have a flat surface and a router table.
With this, check for a fence that allows you to set up a series of stops. It means that the piece you are working on will only travel so far against the bit before it can go no further. With this, it’s the fence that’s important more than the bit.
Lihat postingan ini di Instagram
Creating Dovetail or Box Joints
Creating a specific joint is so much easier with routers, and the process is easier still when you have the right table with the perfect bit.
Consider installing dovetail or box jigs on your table. A jig can be installed on the fence to restrict your movements. It then makes it easier to create small adjustments, and that’s important when making an accurate joint. Look for ones that are designed for creating specific joints.
Add in the correct jig and router tips to create an accurate cut to then produce the joint. It’s then a case of forming the joint with the individual pieces of wood, which should be a lot easier thanks to the accurate cut.
Creating Raised Panel Doors
Creating raised panel doors is another process that’s popular with a router table. While there are different techniques, this one is perhaps the easiest. Also, this particular process is easier to do on a router table, as attempting to cut or create edges on large stock is never easy with a handheld device.
First, you need the correct bit. You will often find this type of bit is larger due to the average dimensions of panel doors. Search for a frame or panel bit as having the right piece does help.
By simply adding in the right bit, the cutting will be perfect with each of the different pieces. The different panels that form a door will fit together perfectly, and that’s the impact that cutting with the correct routing bit has on the result.
Once you have the right bit, use the correct bearing guide to work the piece to create the desired cut or edges, depending on the piece.
Dealing With an End Grain Issue
When trying to work with edges, you may need to deal with an end-grain issue. It is something woodworkers have to contend with regularly, but your search for an answer is over, thanks to the correct routing bit.
All that’s required with an end grain is to make that cut first. Then cut the sides, as that will then mean everything is smooth, instead of the potential for the cutting process to leave a rough edge due to the nature of the grain.
Lihat postingan ini di Instagram
Get a Router Table
Knowing how to use a router table is essential because you should be able to get your head around how you can adjust the height, the bit, and the various applications and add-ons available with a table. Woodworkers will already have some bits that will work with a table. After all, your router is dropped into the table. Then you can change the bit depending on the work to be done.
They are inexpensive but are brilliant items to own. So if you are serious about this type of work, consider adding a table and seeing the difference for yourself.
Would you like to own a router table? What projects will you do? Tell us about them below.
Paul is the type of person who never met a problem he couldn’t fix. He can always be found tinkering with something in his house, even if it isn’t broken! His tips and tricks are often shared on our site. He’s the one you call when something breaks because he has been known to improvise fixes for everything from leaky faucets to malfunctioning dryers.