Last Updated on January 10, 2023
Whether your goal is to beautify, preserve, or both, learning how to apply wood preserver is a brilliant idea.
Exterior wood, including outdoor furniture, fences, decks, and even garden sheds, should be treated with a wood preservative as part of regular maintenance. Doing so keeps it looking its best. Interior wooden furniture and surfaces can also benefit from the protection that wood treatment can provide.
Wood preservatives can add colour or shine to wood surfaces and protects them from mould, algae, decay, and woodworm infestation. You’ll want to make sure you apply treatment correctly for the best results.
Why Treat Exterior Wood?
Wood that has been processed from timber into sawn or planed boards will decay and rot if left untreated. To keep your timber beautiful, you’ll want to apply a wood preserver to protect the wood from the elements and keep it free from damage.
Painted wood or wood coated with wax can also be treated with a clear preserver for the second layer of protection.
What Is the Difference Between Wood Preserver and Wood Treatment?
A wood preserver must be registered with the Health and Safety Executive and certify that it is environmentally friendly. Wood treatments can provide protection through waxes or oils but don’t necessarily have HSE approval.
How to Apply
Follow these application steps when preserving the timber in your home to ensure effective and lasting results.
Step 1: Choose Your Products
Most products suitable for exterior use are similar in the protection they provide against rot, algae, and other environmental factors. Factors consumers consider when choosing wood treatments are whether the products are clear or come in a selection of colours and whether the products are oil-based or water-based.
Clear choices, such as varnishes and oils, let the natural beauty of the wood grain shine through, whilst those with colour preserve the timber while staining it as well.
Oil-based products may last longer, but those with a water base are easier to use and clean up after. Water-based products also conform to environmental regulations regarding volatile organic compounds.
Step 2: Gather Your Tools
In addition to enough product for several coats, you’ll need a paintbrush or roller, cloths and dishwashing liquid or mineral spirits for cleaning up.
Water-based products can be cleaned from brushes with water and detergent, but oil-based products must be removed from brushes with mineral spirits.
Step 3: Check the Weather
The environment can affect your preservation project. Before you begin to prepare timber for application, check the weather forecast. If it rains while you are applying the coats or after you’ve prepared the wood, you might have to start over. Temperatures below 50 degrees Fahrenheit can extend drying time.
Step 4: Prepare Your Wood Surface
When preparing your wood surface for treatment, you need to first search for damage and dirt. You may decide to replace a rough deck board with a sawn one before applying a preserver, or the dirt on your wooden surface may call for the deep cleaning of a power washer.
Sand any rough places on planned boards with sandpaper before cleaning and treating. Make sure it is free from sawdust. Once your surface is clean, dry and free from damage, you can move to the next step.
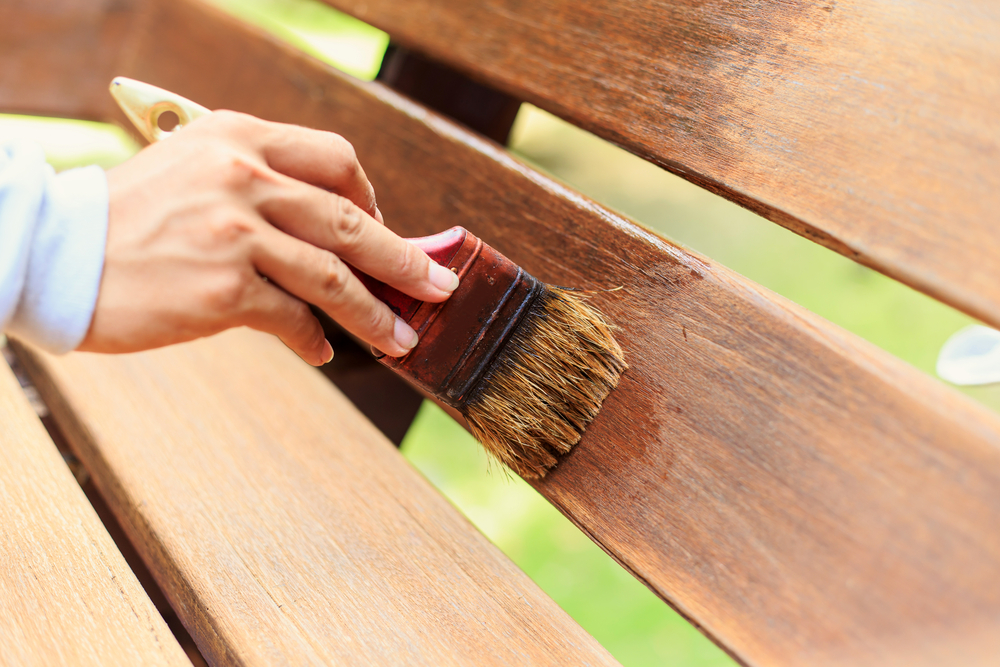
Step 5: Apply the Product
Apply the coats with a roller or paintbrush. Make sure the application is light and even. If applying two coats, brush on the first coat and allow it to dry thoroughly before applying the second coat. It may take a few hours, depending on suitable weather conditions.
Coloured preservative requires two surface coats for favourable results and more vivid colours.
If using a darker shade of preserver on a fence, apply the coats from the top down and stain railings before floorboards to keep from having drip marks.
Remember to paint a light coat over all areas, including ends and edges.
Step 6: Allow Treated Wood to Dry
Once you have treated the wood with a preserver, allow a drying time of at least 24 hours. After it is thoroughly dry, the wood will have the protection needed against the elements. Wait 24 hours before walking on treated spaces.
Step 7: Clean Up
Depending on the type of preserver you use, clean up with either soap and water for water-based products or mineral spirits or other chemicals for oil-based products. Prevent clean-up water and paints from running down a storm drain so you can keep the ground, rivers, and streams unpolluted.
Step 8: Mark Your Calendar
Generally, exterior wood will need a fresh coat of varnish every year. Remember when you applied wood preserver this time so you can do the same thing 12 months later.
It may feel like a chore, but applying a preserver by brush to wood protects your shed or fence from rot and extends its life and beauty. Applying varnish saves you time and money in the long run.
Lihat postingan ini di Instagram
Protect Your Exterior Wood
Woodgrain has a natural beauty that deserves varnished preservation. Your wood will remain strong and beautiful for years to come with suitable varnish application and knowing exactly how to apply wood preserver properly.
You’ll want to search for products that fit your needs and the surface. With a little brushwork and wood preserver, you can protect the wooden surfaces in and out of your home. Follow the tips above to get the best results, and you will have attractive-looking wood that will also resist decay, rot, and rough outdoor conditions.
Have you used a wood preserver? Do you have additional tips for applying it? Please share with us in the comments below.
Paul is the type of person who never met a problem he couldn’t fix. He can always be found tinkering with something in his house, even if it isn’t broken! His tips and tricks are often shared on our site. He’s the one you call when something breaks because he has been known to improvise fixes for everything from leaky faucets to malfunctioning dryers.