Last Updated on January 26, 2023
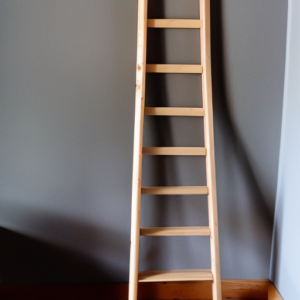
Do you have a loft in your home that needs an access ladder? Well, if so, then we’ve got the perfect project for you – build a wooden loft ladder! This guide will provide step-by-step instructions on how to create a sturdy and stylish wooden ladder from scratch. You’ll need some basic tools and materials before assembling it all together with the finishing touches. So grab your saws and drills because this is going to be one rewarding DIY experience!
Table of Contents:
- Tools and Materials
- Assembling a Wooden Loft Ladder
- Finishing Touches
- FAQs in Relation to How to Build a Wooden Loft Ladder
- Conclusion
Tools and Materials
When it comes to building a wooden loft ladder, the first step is gathering the necessary tools and materials. This includes items such as saws, drills, screws, nails, wood glue and sandpaper. It’s also important to have safety equipment like goggles and gloves on hand for protection during construction.
You will need lumber of various sizes depending on your project specifications; 2×4 boards are typically used for framing, while 1×6 boards can be used for steps or rails. For added stability, you may want to use metal brackets or braces, which can be found at most hardware stores. If you plan on painting or staining your ladder, make sure to pick up primer and paint/stain in advance so that you don’t have any delays once construction is complete.
If you are looking for an extra touch of style, consider adding decorative trim pieces around the edges of each step or rail – these come in a variety of styles, from traditional moulding to more modern designs with clean lines and angles. Finally, if there is going to be any exposed wood after assembly, then it’s important to purchase some sealant or varnish so that moisture doesn’t damage the wood over time.
Gathering all these supplies before beginning construction will help ensure that everything goes smoothly when it comes time to assemble your new wooden loft ladder. Doing so will also save you from any potential delays or frustrations during the process.
Assembling a Wooden Loft Ladder

Before you start assembling your ladder, make sure you have all the necessary tools and materials. You will need a screwdriver, screws, nuts and bolts, washers and a wrench. Additionally, it is helpful to have some masking tape or painter’s tape on hand for marking where pieces should be connected.
Step 1 – Read Instructions Carefully
Reading through the instructions carefully before beginning assembly is essential. This will help ensure that you understand how each piece fits together correctly. Make sure to read any warnings or cautions as well so that you can assemble your ladder safely and securely.
Step 2 – Lay Out Pieces
Lay out all of the pieces in front of you so that they are easy to identify when needed during assembly. If there are any parts labelled with numbers or letters, make sure those match up with their corresponding number/letter on the instructions sheet for easier reference later on in the process. It may also be helpful to use masking tape or painter’s tape to mark off where each piece should go while laying them out in order according to instructions if possible – this will save time when it comes time for actual assembly.
Step 3 – Connect Pieces Together
Once all of your pieces are laid out properly according to instructions (or marked off using masking/painter’s tape), begin connecting them together using screws, nuts & bolts, washers etc., as instructed by manufacturer guidelines provided with product packaging/instructions sheet included with the purchase of ladder itself. Be careful not to over-tighten screws/nuts & bolts as this could damage threads or cause other issues down the line during the use of the ladder itself; just tighten enough until secure but not too tight.
Step 4 – Double Check Work
After completing assembly, double-check everything one last time before attempting to use the ladder itself. Look over connections made between pieces ensuring nothing has come loose since initial tightening occurred earlier during step three above; if something does appear loose, re-tighten accordingly. Additionally, inspect the entire structure from top to bottom, making sure no parts were missed during the original assembly process. If anything appears amiss, take apart sections already completed and reassemble again, following the same steps outlined here once more until satisfied results are achieved.
Finishing Touches
Once you have completed the assembly of your wooden loft ladder, it is time to add the finishing touches. This includes sanding down any rough edges, staining or painting the wood and adding a sealant to protect it from moisture and wear.
Sanding Down Rough Edges
Sanding down any rough edges will help create a smooth finish on your ladder. Start with a coarse grit sandpaper and work up to finer grits until all of the splinters are gone. Be sure to wipe away any dust created by sanding before moving on to staining or painting.
Staining/Painting Wood
Stain or paint can be used to give your wooden loft ladder an attractive finish that will last for years. If you choose to stain, apply one coat with a brush in long strokes following the grain of the wood and let dry completely before applying another coat if necessary. For paint, use two coats for best results – one thin basecoat followed by one thicker topcoat – allowing each layer to dry fully between applications.
Adding Sealant
Adding a sealant helps protect against water damage as well as everyday wear and tear from climbing up and down the ladder regularly over time. Choose an outdoor polyurethane varnish that is designed specifically for exterior use; this type of sealant will provide maximum protection while still allowing some flexibility so that it won’t crack when exposed to extreme temperatures or weather conditions like rain or snowfall throughout its lifetime outdoors. Apply at least two coats according to the manufacturer’s instructions, letting each layer dry completely before adding another if needed for added protection against moisture damage over time.
With these three steps complete, your wooden loft ladder should now look great while also being protected from everyday wear and tear.
FAQs in Relation to How to Build a Wooden Loft Ladder
What angle should a loft ladder be?

The angle of a loft ladder should be between 55 and 75 degrees. This ensures that the ladder is secure and stable, allowing for safe access to your loft space. The optimal angle will depend on the size of the ladder and its intended use, so it’s important to check with manufacturer instructions before installation. Additionally, make sure you have enough headroom in your loft for comfortable access when using the ladder at this angle.
How do you make a simple wooden ladder?
Making a simple wooden ladder is relatively easy and requires basic tools. First, you’ll need to measure the desired length of your ladder and cut four pieces of wood accordingly. You can use either 2×4 or 4×4 boards for this project. Next, attach two pieces together using screws at each end to form an “A” shape frame. To make the steps, cut additional pieces of wood in equal lengths and attach them between the two frames with screws or nails. Finally, add a support piece on top for stability and safety purposes before standing it up. With these few steps, you should have yourself a sturdy wooden ladder that will last for years to come.
How far apart should loft ladder steps be?
The distance between loft ladder steps should be no more than 300mm (12 inches). This ensures that the user can safely and comfortably ascend or descend the ladder. The treads of each step should also have a non-slip surface, such as rubber, for extra safety. Additionally, it is important to check that the gap between each step and its frame does not exceed 100mm (4 inches) so that feet do not slip through when in use. Finally, make sure that the ladder is securely fixed to a wall or other suitable support.
Conclusion
Building a wooden loft ladder is not as difficult as it may seem. With the right tools and materials, cutting, assembly and finishing touches, you can create your own custom ladder in no time! You don’t have to be an expert carpenter to build a wooden loft ladder; all you need is patience and determination. So go ahead – get out there and start building!
Paul is the type of person who never met a problem he couldn’t fix. He can always be found tinkering with something in his house, even if it isn’t broken! His tips and tricks are often shared on our site. He’s the one you call when something breaks because he has been known to improvise fixes for everything from leaky faucets to malfunctioning dryers.

