Last Updated on January 10, 2023
Would you like to know how to cover bathroom tiles without having to remove them? There’s no doubt that attempting to remove all those existing tiles just because you are bored of them is a massive undertaking, complete with a lot of mess.
We do have several options or ideas to discuss with you, and each one certainly has its own merits. It will ultimately be up to you to decide which one best fits in with your desired look when you are sick and tired of your existing tiles.
So, onto the different options to allow you to come to some sort of decision as to which one you should use.
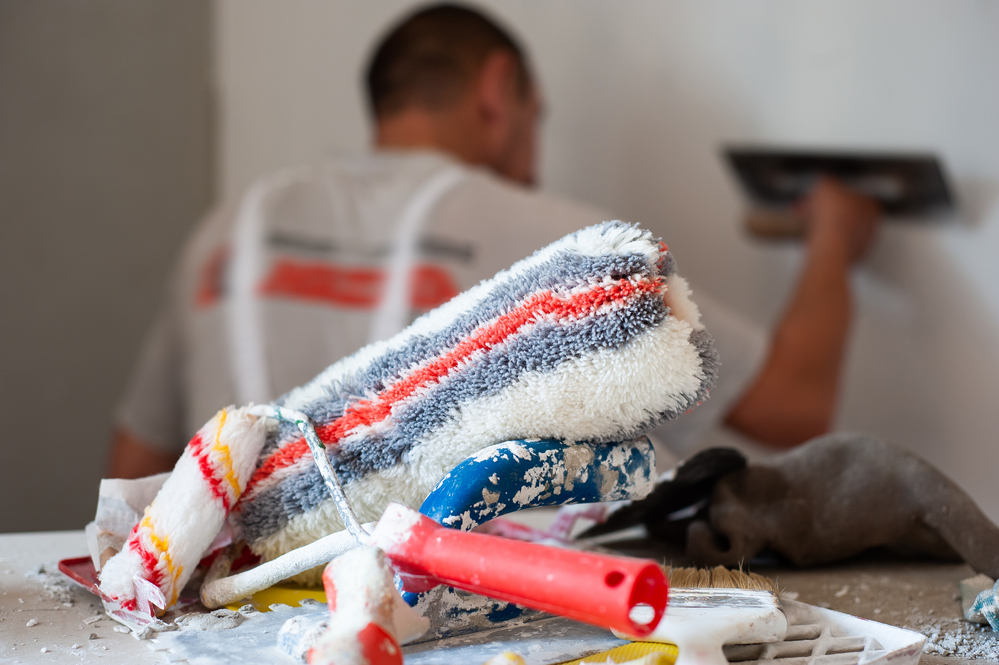
Option 1: Painting the Tiles
The first option we will discuss is covering old bathroom tiles by simply painting them. This will only work when you use the correct paint and if you are happy with the size but hate the colour.
With this option, you cannot use just any old paint: it’s important that you only ever use waterproof tile paint. Many specialist online stores can sell tile paint in various colours, and you should also be able to find this type of paint in large DIY stores.
There are many key steps to follow if you want to get your bathroom wall tiles looking pristine even after a coat of paint.
Step 1: Cleaning
The first step is to make sure your bathroom tiles are spotless. You want to remove as much grime and dirt as possible, so go ahead and scrub the tiles as best you can. Then, allow them to dry completely. You don’t want any moisture landing on the tiles, so avoid this at all costs.
Step 2: Priming the Tiles
You must then apply the correct primer to the tiles, or you might risk that the top coat of paint won’t stick in the way you want. An epoxy paint primer is the best option, followed by a top coat of acrylic latex paint which has that waterproof feature built into it.
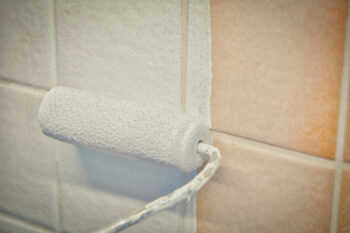
Step 3: Applying the Paint
When painting tiles, you may need to add more than one coat, so it’s fundamental to allow things to dry completely before even attempting a second coat. We also advise you to use only smooth painting strokes when painting your wall tiles: they will show up every single brushstroke, and this will really stand out if done poorly.
Step 4: Sealing the Paint
Finally, you have to seal the paint, or it will simply come off. This step involves using a waterproof sealant, although you can also purchase tile paint that is already waterproof.
Pay attention to the instructions on the tin you use to see if this step is required.
Option 2: Using Bathroom Wall Panels
Another option, which is also cost-effective, is to use bathroom wall panels. These wall panels are specifically designed to look as if they are bathroom tiles, so this is a great way to spruce up your bathroom walls without too much effort.
The wall panels are also completely waterproof, so there’s no need to worry about things from that perspective. However, you still need to know how to install them correctly to get the desired effect.
Step 1: Measure and Cut
Begin by measuring and cutting the wall panels to make sure they fit. These wall panels will also often fit together using a tongue and groove method, so the fit is tight and secure.
However, you still need to measure and cut the wall panels.
Step 2: Insert the Corner and Ceiling Trims
These panels come with corner and ceiling trims, and you must put them in place first. They need to be attached to the wall using silicone glue. The wall panel trim not only gives these waterproof wall panels something to hold on to, but it also gives them a neater final appearance.
Step 3: Attaching the Wall Panels
To attach the wall panels, you need to slot them into the trim and apply silicone glue to the back of the wall panel itself. Be generous with the glue: you are sticking the panel on top of ceramic tiles, so the tile surface needs to be covered in glue for it to work. Then, press hard to allow it to adhere and wait for it to dry.
Option 3: Quick Setting Cement
Using cement is an option that will require a bit more work. Furthermore, the idea of using quick-setting cement may not be the most attractive of ideas for you, but it does work well. Fast setting cement is even used underwater, so it won’t have a problem hardening off even if there is moisture in the area.
The problem here is that you need to mix the cement and work fast. It is a great way to cover tiles, but you should be aware of the potential for cracks to appear in the cement as it dries. If this does happen, you need to cover the cracks with some sealant to stop water from getting into the cement and damaging it.
Option 4: Using Tile Stickers
Perhaps you are just tired of all the tiles looking the same, so one option is to break up that monotony by using tile stickers. This can be an inexpensive way of doing things, and you don’t need any kind of expert knowledge either.
These wall stickers are specifically designed to be attached to the existing surface. Simply peel off the backing, and apply them to the old bathroom tiles. You can install tile stickers in minutes, and yet the difference it can make to entire tiled surfaces is astonishing.
When it comes to wall stickers, you also have a number of designs and colours to choose from. If you want to do some simple bathroom renovations to cover old bathroom tiles with ease, this is a cost-effective option that can look amazing.
When applying, make sure you get rid of the soap scum on the tiles before you attach them. This is the only way in which you will get a good adhesive bond and where the stickers won’t just fall off the tiles.
Option 5: Beadboard Panels

Using beadboard panels does involve some additional skills, but it can cover a large tile area in next to no time. If you are willing to take on board a slightly larger DIY project, then this could be the answer.
Also, you can purchase these panels in large sheets, and there’s no need to have them professionally installed. However, if you do not have basic carpentry knowledge, it may be best to get some help to make everything look spectacular. But if you want to do it by yourself, then this is what you need to do.
Just one last tip: make sure you clean the old tiles before doing anything else. You should never seek to cover tiles that are dirty or wet, so also ensure there’s no chance of mould growth developing under your new bathroom walls.
Step 1: Measure and Cut
As with other wall panels, you need to measure and cut the panels according to the size you need to cover your tiles. This is the easiest part, but do take your time to ensure you have the correct size if you plan on making it a permanent solution.
Step 2: Applying Liquid Nails or Glue
You have to use the correct adhesive to get these boards to stick to your old tiles. Put the liquid nails all over the clean surface and press the boards onto the tiles. The adhesive works fast, so it should start to hold quite quickly. However, you still have some time to adjust and make sure it is actually covering the tiles in the way you want.
Step 3: Allow It to Set, and Paint
The final step is to simply allow it to set before you can get to work even adding some waterproof paint to the beadboard. The waterproof paint, which is often epoxy paint or latex paint, will happily sit there on the board, but you should still seek to seal it if you are concerned.
Tips on Trying to Cover Bathroom Wall Tiles
While we have looked at different options, we also have many specific tips to keep in mind when you want to cover tiles.
Tip 1: Scrub Those Old Tiles
The first tip is to always scrub those old tiles before you put anything on top of them. Old tiles will build up grime, and the grout will also pick up some dirt in the bathroom. You want to remove that before you do anything else. A damp cloth will not do the job, especially if you have tiles made from natural stone and then sealed.
Spend time working on getting things clean, and this will make your life easier.
Tip 2: Only Use Specially Formulated Adhesive
Perhaps the key thing when learning how to cover wall tiles without removing them is the need to use the correct adhesive to attach anything to those bathroom tiles. You must remember the level of moisture in the bathroom. The wrong adhesive will mean your apparently ideal solution will then turn into only a temporary fix in your bathroom.
Also, if you plan to use a self-stick tile, ensure it is for the bathroom. Alternatively, you may find these tiles that state they are ideal for the bathroom or kitchen, which is fine. They should still have the correct adhesive on the rear to make sure they stick well.
Tip 3: Use Sealant When Required
Don’t be afraid to use a sealant in your bathroom when required. Also, if you are painting the tiles, then use multiple coats and a waterproof primer. This should prevent the paint from peeling off those bathroom tiles.
Tip 4: Don’t Be Afraid to Get Help
The final tip is to not be afraid to get some help here. This is especially true if you are using any panel methods that require a ceiling profile to make sure the panels are secure.
Do not try and do this yourself if you have limited experience and skills. You could easily end up even damaging the existing bathroom tiles and not being able to get everything looking as good as you wanted to. If you are limited with using a craft knife, then go for the easiest bathroom tile option, which is to paint or apply stickers to change their appearance.
Cover Your Bathroom Tiles Properly
And that is how to cover bathroom tiles without the need to remove the old ones. There’s no doubt it can freshen up the entire bathroom in a relatively short space of time, and that’s great. It means you can completely change the feel of the room, and it will also cost you less money as well.

Ian loves everything that revolves around the home improvement niche. He loves trying out new home appliances. He has also handled a lot of equipment and has a lot of insight. Plus, he’s worked on various home improvement projects that became a success. If Ian isn’t busy working on his latest project, you can find him reading up about another one!