Last Updated on January 26, 2023
If you’re looking for a creative way to store your kitchen bin, why not fit it inside a cabinet? It’s easier than you might think! We’ve got all the information and tips you need to make sure that your kitchen bin fits snugly into its new home. From measuring up correctly before installation to ensuring everything is secure once in place – our guide will have your kitchen organised and looking great in no time. So what are you waiting for? Let’s get started learning how to fit a kitchen bin inside a cabinet!
Table of Contents:
Measure Up
When it comes to installing a new bin in your home, the most important step is to measure up. It’s essential that you get the size of both the cabinet and bin right before attempting to fit them together.
Measuring accurately can be tricky, but there are some tips that can help make sure you get it right. Firstly, use a tape measure or ruler for accuracy – don’t just guess. Make sure you double check your measurements, too – once is never enough when it comes to this kind of job.

It’s also important to remember that different bins come in different sizes, so make sure you have the correct measurements for whichever one you choose. You should also consider any additional space needed around the edges of your bin if necessary – this will ensure a snug fit with no gaps between the cabinet and bin when they are put together.
Finally, always allow yourself extra time to measure up, as getting it wrong could cause problems later on down the line, which may require costly repairs or replacements. Taking care at this stage will save time and money in the long run.
Once you have determined the size of your cabinet and the size of your bin, you can move on to preparing for installation.
Preparing for Installation
Clear the Area
Before you begin the installation, it is important to clear the area of any existing bins and debris. This will help ensure that your new bin fits properly and looks its best. Be sure to clean the surface thoroughly with a damp cloth or mild detergent before beginning installation.
Measure Twice, Cut Once
It’s essential to measure twice and cut once when installing a bin in order to get an accurate fit. Take measurements of both the opening where you plan on placing your bin as well as the size of your new bin itself. Make sure there is enough room for it to fit comfortably without being too tight or too loose.
Check for Level Ground
Once you have measured out where you want your bin placed, check that the ground is level by using a spirit level or other measuring tool if necessary. Uneven surfaces can cause problems during installation, so make sure everything is even before continuing on with the installation.
Clean & Dry Surfaces
Before starting the installation, be sure all surfaces are completely dry and free from dirt or dust particles which could interfere with adhesion later on down the line. If needed, use a soft brush or vacuum cleaner attachment to remove any excess dirt from hard-to-reach areas such as corners and crevices in order to guarantee optimal results after the installation has been completed.
Clear the Area
Before you begin installing your new bin, it is important to make sure that the area is clear of any existing bins or debris. Remove any old bins and clean up any dirt or dust in the area. Make sure that all surfaces are dry before beginning installation. This will help ensure a successful installation process and prevent potential damage to your bin from moisture or dirt particles.
Measure Up
Once you have cleared the area, measure out where you want to install your bin. It’s important to get accurate measurements so that your bin fits properly and looks great when installed. Take into account any surrounding objects, such as walls, cabinets, shelves, etc., so that there is enough space for easy access and manoeuvrability around the bin once it has been installed.
Gather Supplies
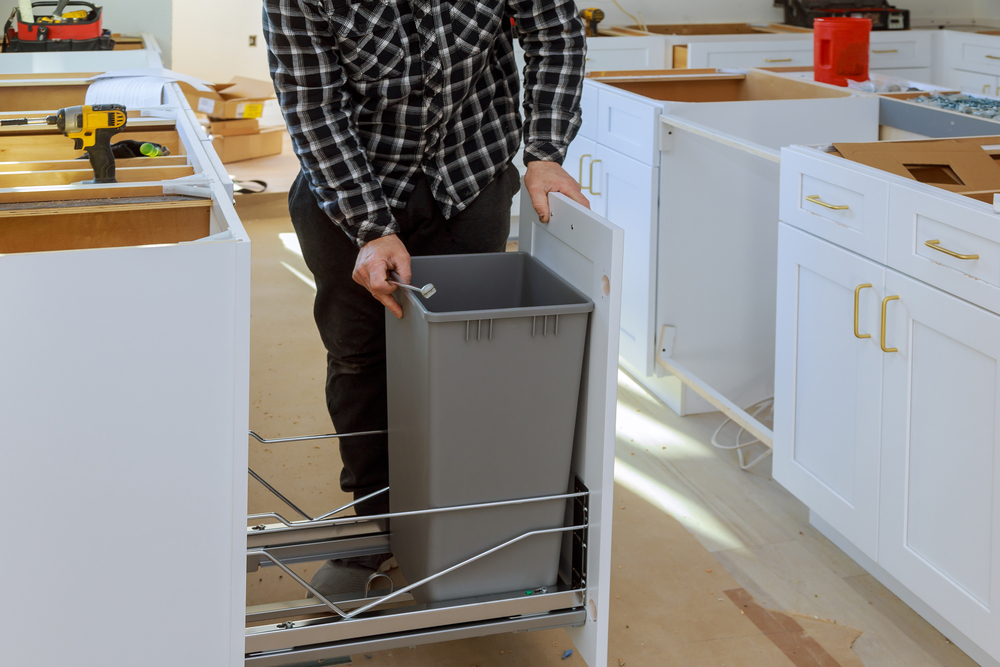
Now that you have the necessary tools and supplies, it’s time to begin the installation process. Follow the next steps to install your kitchen bin inside a cabinet.
Installing Your Bin
If you’ve just purchased a new kitchen bin, it’s time to get it installed. Installing your bin correctly is important for both safety and convenience. Here are some tips on how to install your bin the right way:
Measure Up
Before installing, make sure that you have enough space in the cabinet or area where you plan to put the bin. Measure twice before drilling any holes so that everything fits perfectly when it comes time to install.
Preparing for Installation
Once you’ve measured and know exactly where your bin will go, start prepping by gathering all of the necessary tools and supplies, such as screws, brackets, drill bits, screwdriver etc. Make sure that all of these items are readily available before starting installation.
Installing Your Bin

Finally, adjust the height if necessary by loosening or tightening the hinge pins until you reach your desired height. Be careful not to overtighten them as this can cause damage over time due to constant use and wear-and-tear on the product itself. Once you are done, check for levelness one more time before finishing up the installation process completely; make sure everything looks good aesthetically speaking too.
Conclusion
Installing a kitchen bin inside a cabinet is not as difficult as it may seem. With the right measurements, preparation and installation steps, you can easily fit your kitchen bin into any cabinet with ease. Now that you know how to fit a kitchen bin inside a cabinet, you can make sure all of your bins are neatly tucked away and out of sight!
Paul is the type of person who never met a problem he couldn’t fix. He can always be found tinkering with something in his house, even if it isn’t broken! His tips and tricks are often shared on our site. He’s the one you call when something breaks because he has been known to improvise fixes for everything from leaky faucets to malfunctioning dryers.

