Last Updated on February 23, 2023
Instant boiling water taps are a fantastic addition to any kitchen. Not only do they stop you from having to wait for the kettle when you want a cup of tea, but you can also use the best boiling water tap for cooking vegetables, noodles or pasta in a fraction of the regular time, amongst many other benefits.
A boiling water tap installation might sound like a big job, but we’re going to take you through everything you need to know to be able to do it yourself. As we look at how to install a boiling water tap, we’ll see that so long as you’re careful, it’s a relatively straightforward job.
How Easy Is It to Fit a Boiling Water Tap?
Due to its energy-efficient design compared to the typical kettle, one of the numerous benefits of purchasing a boiling water tap is saving money.
However, as the hot water fixtures aren’t cheap to purchase, it will take longer to get your money back if you pay a professional to install them.

If you’re confident with typical DIY jobs, you’ll be able to install a boiling water tap without much trouble. Follow our step-by-step guide, and you might surprise yourself!
Before attempting instant hot water taps installation by yourself, keep some things in mind.
- The tap’s boiler needs a suitable rated safe plug socket. If you don’t have one ready to use, it’s usually better to have an approved electrical contractor install the supply.
- If you are going to replace an old kitchen mixer tap, the job is usually straightforward. Most boiling water taps are monobloc designs, so you only need one hole in your sink. The new boiling tap completely replaces your old cold and hot water tap.
- Alternatively, if you’re adding a monobloc tap to replace separate hot and cold taps, you’ll need to consider a new sink or, if possible, use blanking caps for the old holes and drill a new centre hole.
- If you’re adding a boiling-water-only tap, then you’ll need to drill an extra hole in your sink to use it with your current tap.
Once you’ve sorted these minor issues, installing a boiling water tap is a pretty straightforward DIY task.
Follow the manufacturer’s instructions completely, and you’ll soon be enjoying your new and highly convenient boiling water supply.
What Tools Are Needed to Install an Instant Hot Water Tap?
In addition to the installation kit itself, you’ll need the following tools.
- Drill, Drill Bits, and Hole Cutter Bit: To drill holes for the water tank fixings and if you need to cut a new hole in your kitchen sink.
- Bucket or Tray: To catch inevitable water spills as you remove and replace the old water tap and pipework. A washing-up bowl works very well and doesn’t take up too much space as you work.
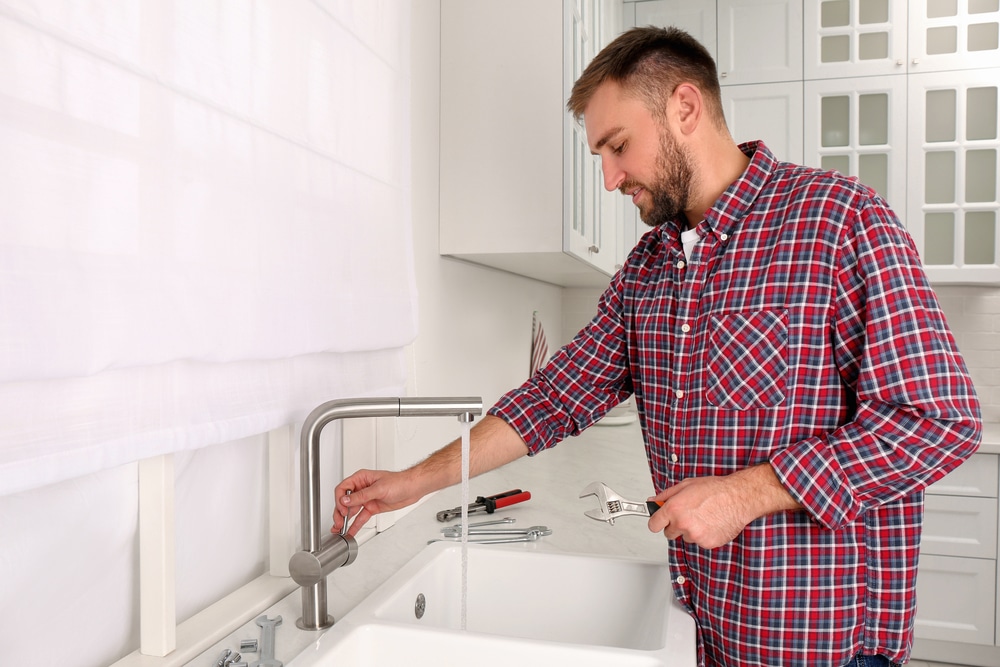
- Adjustable Spanner or Water Pump Pliers: To loosen and tighten the 1/2″ water pipe lock nuts and remove and install the tap on the sink.
- Screwdriver: To fasten the fixings that secure the water tank.
- Plumbing Fittings: What you need precisely will depend on your situation. However, most boiling water taps come with installation parts covering most normal requirements.
- PTFE Tape: The plumber’s friend! Don’t forget to apply tape to any threaded pipe connections to help prevent leaks.
- Pressure Reducing Valve: Depending on how strong your cold water pressure is, you may need to fit a pressure reducing valve, so you don’t exceed the tap’s maximum pressure. If you’re unsure, it’s better to install one on the mains water supply to be sure to protect your new tap.
Installing Boiling Water Taps in 8 Steps
Let’s go through how to install a boiling water tap. We’ll assume that you’re replacing an old mixer tap with a new boiling water one. The instructions for replacing your existing tap must be skipped if you’re installing a separate boiling-water-only tap because you will keep your cold and hot water taps.
Step 1: Read the Instructions!
Although most boiling hot water taps are pretty similar to install and operate, you should always take the time to read your tap’s specific operating instructions.
Step 2: Turn Off Your Mains Water Supply
Switch off your hot and cold water supply. Open the hot and cold taps for a few seconds to release any remaining pressure. Check that the taps remain open while you’re carrying out the installation.
Step 3: Prepare the Space for Installation
Clear out the space in the cupboard beneath your sink where you will install the boiler tank. It’s usually tight working underneath a sink, so you’ll need all the room you can get.
Put your bucket or bowl underneath the existing tap to catch any remaining water that might spill when you undo the fittings.
Disconnect the old mixer tap from the hot and cold water feeds and remove it.
Position the hot water tank and use the supplied fixings to secure it in place not too far from the hot and cold water feeds.
Step 4: Fit the Instant Boiling Water Tap
Working from above, carefully feed the new taps with hot and cold feeds and electrical wiring through the hole if it has any.
Then, from underneath, tighten the tap to secure it, making sure to follow the manufacturer’s instructions.

Step 5: Attach the Water Connections
Connect the water pipework to the boiler and tap, following the supplied instructions and connection kit. If needed, fit your pressure reduction valve to the boiler’s inlet before connecting the cold water supply.
Step 6: Turn On the Water and Check for Leaks
When all the pipes are connected, it’s time to turn on the water and check for leaks. Do not connect the electrical supply yet.
Open your hot and cold water valves and wait a few minutes. Carefully check your connections for any leaks or loose connections.
Next, it’s time to fill the boiler with water. Open the instant hot water tap using the instant hot water handle or safety button and keep it open until all the air has cleared from the tank and pipes and water starts to flow out of the tap.
Turn the tap off and carefully check the boiler and all connections for leaks. Assuming that all is well, you can move to the next step. You must fix any leaks before switching the boiler on.
Step 7: Switch on the Boiler
When you’ve made sure that there aren’t any leaks, you can plug your boiler into the power socket and switch it on. Follow the instructions to set the thermostat to the required temperature and leave the system to heat up.
Step 8: Test Your New Boiling Hot Water Tap
Now it’s time to test your tap. It’s a good idea to let a little water flow through before making your first cup of tea. Remember to test the flow from your regular cold and hot water taps and your new boiling tap (and cold filtered water if you have it).
You’ll probably have to familiarise yourself with the safety features of your new kitchen tap and get used to them. They’ll soon become second nature. The water is very near the boiling point, so it’s important to take care to prevent injuries!
It’s worth making another check for leaks when the system has heated up in case any have occurred when materials have got hot.
Easy Boiling Water Tap Installation
So there you have it. That’s how to install a boiling water tap.
Make sure you follow the specific manufacturer’s instructions for your hot water tap, and together with our guide, you’ll be enjoying hot drinks made from your new kitchen tap without having to wait for the kettle to boil!
Your new instant boiling water tap has so many uses you’ll soon be wondering how you ever did without it.
Paul is the type of person who never met a problem he couldn’t fix. He can always be found tinkering with something in his house, even if it isn’t broken! His tips and tricks are often shared on our site. He’s the one you call when something breaks because he has been known to improvise fixes for everything from leaky faucets to malfunctioning dryers.