Last Updated on February 6, 2023
Creating a french cleat without the help of a table saw may seem like an impossible task, but it can be done. If you’re looking for ways to make your own custom DIY projects without having to invest in expensive power tools, this guide is here to show you how. From gathering materials and cutting wood down to assembling the cleat and making those finishing touches, we’ll take you through every step necessary on how to make a french cleat without using that intimidating table saw. So let’s get started – follow along as we break down each part of creating this unique piece with ease.
Table of Contents:
- Gather Your Materials
- Cutting the Wood
- Assembling the Cleat
- Finishing Touches
- FAQs in Relation to How to Make a French Cleat Without a Table Saw
- Conclusion
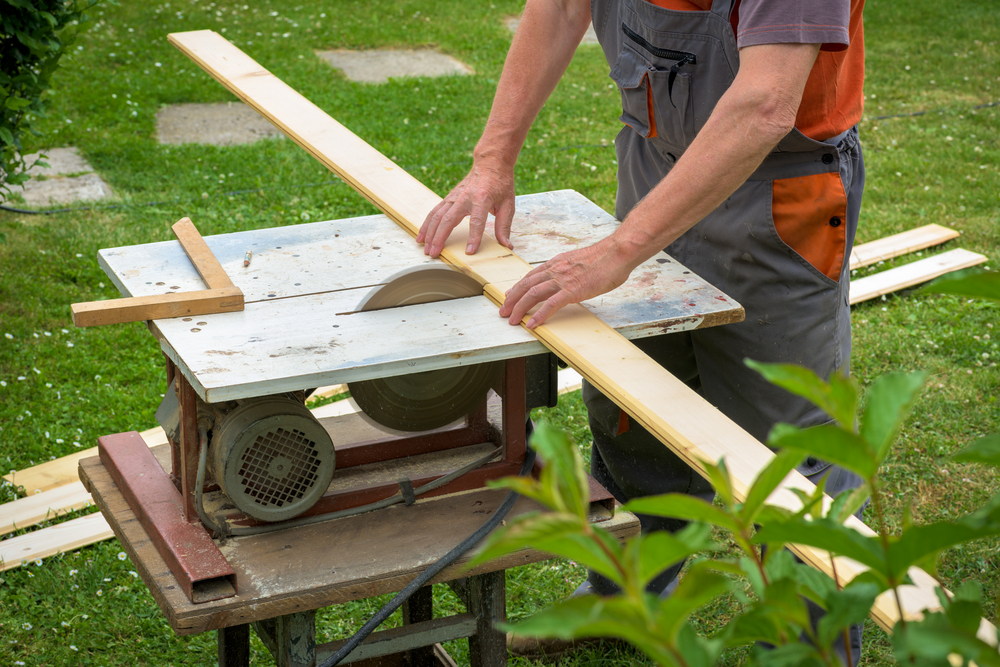
Gather Your Materials
If you’re looking to make a French cleat without using a table saw, you’ll need some basic materials. To get started, gather your mitre saw, clamps, wood glue and two pieces of wood. The size of the wood will depend on what project you are making with the cleat. For example, if you are making shelves or hanging pictures, 1x2s should be enough, but for larger projects like cabinets or wall panels, 2x4s may be necessary.
Once all your materials have been gathered, it’s time to start cutting the wood. Make sure that when selecting your boards, they are straight and free from any knots, as these can cause problems later on in the process. Measure out where each cut needs to go before starting so that everything is precise and accurate when assembling later on.
Now that both pieces of wood have been cut, it’s time to assemble them into a cleat shape using clamps and wood glue for extra stability and strength. Start by clamping one piece onto a flat surface such as a workbench or countertop with its long edge facing up towards you, then place the other piece over top at an angle so that it forms an “L” shape when viewed from above – this is how French cleats typically look once assembled together correctly. Once both pieces are aligned properly, apply generous amounts of glue along their edges before clamping them firmly together until dry (usually around 30 minutes).
Finally, add some finishing touches such as sanding down any rough edges or painting/staining if desired before attaching it wherever needed – whether that be walls, furniture etc. With that done, your homemade French cleat is ready for whatever project comes next.
Cutting the Wood
When it comes to cutting the wood for a French cleat, you’ll need to use a mitre saw. A mitre saw is an essential tool for making angled cuts in wood and other materials. It’s also one of the most common tools used by DIYers and professionals alike.
To begin, ensure your workpiece is securely clamped down on your workbench or table before starting any cuts with the mitre saw. This will help ensure that your cut pieces are accurate and safe from kickback during operation.
Next, adjust the angle of the blade on your mitre saw so that it’s set at 45 degrees relative to the base plate of the saw itself. You can do this by loosening up two locking screws near where you place your material for cutting, then turning them until they line up with an indicator marking “45” (or whatever degree angle you want). Once these screws are tightened back into place again, you should be ready to start cutting.
Once everything is lined up correctly, turn on your mitre saw and slowly lower its blade onto each piece of wood while keeping firm pressure against both sides of its guard – this will help keep all fingers away from harm’s way. After completing one side, rotate each piece 180 degrees around so that their opposite ends can now be cut at 45 degrees – repeat what was done earlier for accuracy here as well.
And there you have it – once all four pieces have been successfully cut according to plan using a mitre saw set at 45 degrees relative to its base plate, congratulations. Now move on to assembling those pieces together into something truly beautiful.
Assembling the Cleat
Once you have your materials ready, it’s time to assemble the cleat. Start by laying the two pieces of wood together and making sure they fit snugly. If necessary, use a saw or sandpaper to make any adjustments needed for a perfect fit.
Next, apply an even layer of wood glue on both sides of the cleat and clamp them together tightly with clamps at each end. Make sure that there are no gaps between the two pieces, as this will weaken its structure when finished. Let it sit overnight so the glue can fully dry before proceeding further.
When you’re ready to finish assembling your cleat, use screws or nails to secure it in place along all four edges – top, bottom, left and right – depending on what type of material you used for construction. Be careful not to over-tighten these fasteners, as this could cause damage or breakage later down the line.
Finally, give your newly assembled cleat one last check-over for any imperfections, such as misaligned joints or uneven surfaces, which may affect its overall performance once installed in place. Pay attention to the details during the assembly process, and you should now have a sturdy piece of furniture ready for installation in your home or garden space.
Finishing Touches
Sanding down any rough edges is an important step when finishing off your French cleat. This will ensure that the surface of the wood is smooth and free from splinters, which can be dangerous if left untreated. Start by using medium-grit sandpaper to remove any large imperfections or jagged edges. Once you have removed these larger pieces, switch to a finer grit paper for more detailed work. Be sure to move in the same direction as the wood grain, so you don’t create scratches on its surface.
When you are finished sanding, use a damp cloth or rag to wipe away any sawdust or debris that may have been created during this process. You should also check for nails sticking out and hammer them back into place before moving on to painting or staining your French cleat.
If you plan on painting your French cleat, start by priming it with an oil-based primer specifically designed for outdoor projects like this one. After allowing ample time for drying (check product instructions), apply two coats of paint in even strokes with a brush made specifically for outdoor projects such as decks and fences – avoid using foam brushes as they tend to leave behind streaks. Allow each coat plenty of time to dry before applying another one; again, refer to product instructions here too.
Staining is another great option if you want something darker than paint but still want protection against weather damage over time – make sure it’s suitable for outdoor use. Start by wiping down your project with mineral spirits, then apply two thin coats of stain evenly across its surface with either a brush or rag, depending on what type of finish you prefer (glossy vs matte). Again, allow plenty of time between coats and read product instructions carefully before starting this process.
FAQs in Relation to How to Make a French Cleat Without a Table Saw
How do you cut a French cleat by hand?
Cutting a French cleat by hand requires the use of two saws. Start by measuring and marking the desired length of your cleat on a piece of wood. Next, set up a mitre saw to make an angled cut at 45 degrees along one side of the marked line. Flip the board over and repeat this step for the other side to have two pieces with opposing angles. Finally, use a circular saw to cut along the straight edge between both angled cuts to create your French cleat.
What can I use instead of a French cleat?
If you’re looking for an alternative to a French cleat, consider using toggle bolts. Toggle bolts are made up of two parts: a machine screw and a spring wing toggle. The machine screw is inserted into the wall, then the wings on the toggle are folded down and pushed through the hole in the wall until they open up behind it. This provides strong support for heavy objects like shelves or cabinets that need to be hung securely. Another option is molly bolts, which use an expanding sleeve instead of wings to secure items against walls or ceilings without damaging them. Both options provide reliable support for heavier items than traditional screws can handle.
How do you cut a 45-degree angle without a table saw?
Cutting a 45-degree angle without a table saw can be done with the help of a mitre box. A mitre box is an inexpensive tool that allows you to make precise angled cuts in wood and other materials. To use it, place your material into the slots of the mitre box and then guide your saw along the desired cut line. The angles are marked on the sides of the mitre box, so you know exactly where to position your saw for accurate results every time. With practice, you’ll soon become an expert at making perfect 45-degree cuts without needing any fancy tools.
Can you make French cleats out of 2×4?
Yes, it is possible to make French cleats out of 2×4 lumber. To do so, you will need to cut the 2×4 into two pieces that are equal in length and width. Then use a mitre saw, or table saw to create 45-degree angles on each end of both pieces. Finally, attach one piece horizontally onto the wall with screws and then attach the other piece vertically onto the horizontal piece using more screws for added stability. With this simple process, you can easily create your own French cleat from 2×4 lumber.
Conclusion
Making a french cleat without a table saw may seem like an impossible task, but with the right materials and careful attention to detail, it can be done. By following these steps, you’ll have your own homemade french cleat in no time. You don’t need expensive tools or special skills to make a french cleat without a table saw – just some patience and creativity. So go ahead and give it a try – you might surprise yourself with what you can create.
Paul is the type of person who never met a problem he couldn’t fix. He can always be found tinkering with something in his house, even if it isn’t broken! His tips and tricks are often shared on our site. He’s the one you call when something breaks because he has been known to improvise fixes for everything from leaky faucets to malfunctioning dryers.