Last Updated on January 10, 2023
As one of the most useful, revolutionary home kitchen appliances, bread makers are surprisingly easy to use. Nothing quite beats the delicious aroma, flavour and texture of freshly baked bread. If you’re not sure how to use a bread maker, we’ll help you get started with our step by step guide and helpful bread maker tips. Here’s all you need to know to successfully bake your first homemade loaf.
Bread Makers Explained
While industrial bread-making machines have been around for many years, small household bread makers first became easily accessible in the 1990s. In recent years, home bread machines have become increasingly popular – no doubt as a direct result of our desire to eat more healthily, as well as with society’s greater focus on home baking and cutting out unnecessary additives.
What Exactly Does a Bread Machine Do?
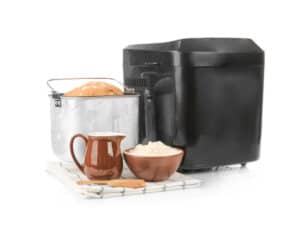
It makes bread! Bread makers are electrical appliances that mix, knead and proof your dough, before baking it. In essence, they are a mixer, prooving machine and mini oven combined, capable of automatically transforming your ingredients into a fresh, homemade loaf of bread.
How Do They Work?
 Your bread machine is specially programmed to produce different types of bread loaves. Depending on the programme selected and the ingredients used, your bread maker will mix, knead, then proof for the preset durations, before baking your bread.
At the bottom of the pan, where you place your ingredients, there is a paddle that is responsible for the mixing and kneading stages. Your bread machine will automatically adapt each stage to match the selected programme, so all you have to do is measure out your ingredients, select the type of bread, and press start.
What Are the Different Types of Bread Makers?
Most bread machines are very similar, although their exact programmes, capacity, and design can vary considerably. Capacity is one of the most important discerning factors as you’ll need a model that can accommodate your average needs.
- Vertical – most models are of the vertical type, meaning your loaf is baked vertically. These machines only feature one kneading paddle.
- Horizontal – featuring two paddles in their bread pan, these models bake your bread horizontally.
- Small – with a one or one-and-a-half-pound capacity, small bread machines are compact and easy to store. However, they are best suited to single-person households or couples who don’t get through a lot of bread.
- Large – capable of producing two-and-a-half or three-pound loaves, large bread makers are great for families. They are also a good choice if you regularly entertain, as these machines allow you to make small loaves on a day-to-day basis, with the capacity to increase the size when needed. They do, however, take up a lot of space.
- Multi-purpose – aside from making bread, multi-purpose models often have programmes to make jam, yoghurt, cakes and pizza dough.
View this post on Instagram
Is It Easy to Use a Bread Maker?
In a word, yes! Bread makers are very easy to use, provided you stick to the recipes in your bread makers instructions. It really is as simple as measuring out the wet and dry ingredients and pressing start.
The traditional bread-making process by hand takes much more effort. To illustrate the process a bread maker automatically does for you, here is a brief outline:
- Mixing – after measuring your ingredients out, they need to be well mixed together to make the dough.
- Kneading – in order to ensure that your dough will rise well, you’ll need to put in plenty of elbow grease when making bread by hand. This can be quite a workout.
- Rising – leave your kneaded dough in a warm place for several hours until it has doubled in size.
- Knocking down – this involves punching your dough back into the bowl to knock the air out of it before leaving it to rise a second time.
- Proving – after knocking your dough down, place it in your bread tin and leave it to rise again.
- Baking – place your pan in your preheated oven and bake.
Sounds like a lot of work? It sure is, and while handmade bread is often far superior, it is very time consuming and can be difficult for beginners to get right. Bread makers, on the other hand, are fully automatic and easy to use. Provided you measure out your ingredients precisely, as recommended in your recipe booklet, the results will be consistently good.
How Do You Put Ingredients in a Bread Maker?
To help you get started using a bread machine, we’ll go over all of the steps required to achieve deliciously tasty home-baked bread, as well as some handy tips for using your bread machine.
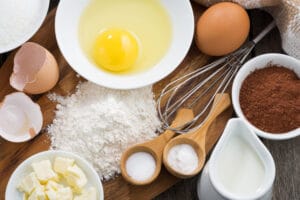 Before adding your ingredients to your bread maker, it is recommended that you remove the interior pan. Follow your manufacturer’s instructions for your exact model; some simply pull out, while others need to be twisted out. Once you’ve removed your pan and have checked that the paddle is securely in place, it’s time to carefully measure out your ingredients.
If you are going to be baking straight away, the order of ingredients is less important as they will be mixed up straight away. However, if you are using a delayed start time and want to make your bread a little later, you will want to add the ingredients in the order we point out below. Whether you’re following a basic bread recipe or you want something fancier, the ingredients and process largely stay the same. People also find that adding the ingredients to their bread machine in this order makes for a smoother mixing process.
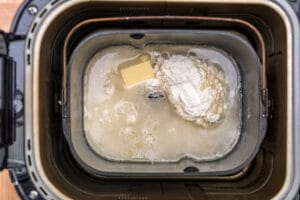
- Add the liquids to your pan first.
- Then add the flour. You’ll want the flour to seal off the water completely.
- Add other dry ingredients such as seasonings, sugar, salt, or milk powder.
- Add your active dry yeast. The yeast should be the last ingredient that you put in. If the yeast comes into contact with the water before you’re ready to start your programme, it will become activated too early, which will ruin your bread. So, make sure it is separated from your water by the flour. Some machines have a dedicated yeast dispenser to ensure that your yeast won’t activate until your programme starts, which is ideal if you are planning on frequently using the delayed start function.
If you want to make different kinds of loaves and use additional ingredients such as vegetables, raisins, nuts, or cheese, it’s important to add them after the kneading cycle. Adding these ingredients too early can result in them being crushed. Most bread machines have an alarm that goes off to let you know when it’s time to add these kinds of ingredients, or you can purchase a bread machine with an automatic fruit and nut dispenser. This is a good choice for when you’re out or busy around the house, allowing you to bake a wider variety of speciality bread without having to hang around your kitchen.
What Temperature Should My Ingredients Be?
It’s best to use liquids that are room temperature or slightly warmer. While this is less important on a regular cycle, it can make a huge difference when using a rapid programme, and when refrigerated liquids may not reach room temperature in time.
While yeast does its job much better at warm temperatures, you don’t want to use hot liquids as this could kill your yeast. So, if your ingredients are a little cold, place them somewhere warm prior to setting up your bread machine.
Step-by-Step Guide to Using Your Bread Machine
 Now that you’ve got your ingredients ready at room temperature, all measured out, and in the correct order in your bread machine pan – what happens next? Well, you’ll need to carefully replace the pan inside your machine and programme your bread maker. All models vary, so be sure to read through your owner’s manual to find out how to programme your exact model.
Here’s a general outline of what you should expect when programming your bread maker. Note that not all bread machines will have all of these options, so be sure to check your instructions beforehand.
- Choose your bread type – this could be whole wheat, basic, French, pizza…
- Select your baking mode – here you can choose a rapid cycle, a regular one, a dough cycle (where you can remove the dough once it’s been made so you can bake it in the oven) or any number of presets that feature a varied length sequence of mixing, kneading, rising and baking.
- Choose your loaf size – larger models allow you to choose your loaf size, whereas smaller bread machines may not have this option. With large bread makers, you can typically select a small, medium, or large loaf and match your baking time to the needed quantities.
- Crust settings – any good bread machine will allow you to select your level of crust browning; three levels including light, medium, and dark crust are standard.
- Set your timer – this will display how long it will take to get your loaf ready and baked.
- Select “Start” – you are now well and truly on your way to having a home-baked loaf of fresh bread.
How Long Does a Bread Maker Take?
As your bread machine takes care of the whole process, it will take several hours. However, rapid cycles can take as little as two hours, while your standard cycle generally takes around three to four hours depending on your loaf size and its composition.
Top Tips to Get the Best Results From Your Bread Maker
If your loaf comes out too heavy, flat, or dense, don’t worry. Read through our bread maker tips and find out how to easily improve your dough and home-baked bread.
- If you’re new to bread making, or it’s a new or new-to-you machine, one of the most important tips is to make sure you stick to the recommended quantities – at least initially. Choose a basic loaf and follow the instructions to a T. Once you get good results, you can try more complicated versions or experiment with your own recipes.
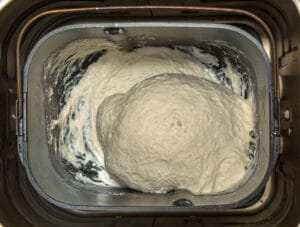 Using too much liquid can cause your loaf to collapse. If your bread hasn’t risen as it should, next time try cutting back on liquids to achieve a better wet-dry ratio. Once the mixing process is complete, your dough should have a ball like consistency that sticks to the sides yet also peels away easily.
- Don’t be afraid to open up your bread maker in the early stages. Provided your bread machine isn’t baking, if you can’t get a good enough view via the window, open it up and make sure that your dough consistency is correct.
- Use filtered or bottled water for the best results. Chlorine in your tap water can kill the yeast. So, if your dough consistency isn’t looking good and you’re using the right quantities, you may want to try out replacing your tap water to see if it’s the culprit preventing the dough from rising.
- Likewise, too much salt can have an adverse effect on your yeast. While salt is essential to strengthening your loaf’s gluten structure and adds flavour, too much salt can negatively affect the yeast and, thereby, the dough’s prooving and rising stage. 1.8%-2% of your flour’s total weight in salt is the generally accepted optimum amount.
- Looking for a lighter, more airy loaf recipe? Try recipes with flour that has a higher protein content. Bread flour, also known as strong flour, is made from hard wheat varieties for more elasticity which better holds the gas from the yeast. You could also try increasing the amount of yeast that you use to achieve a fluffy loaf with more rise.
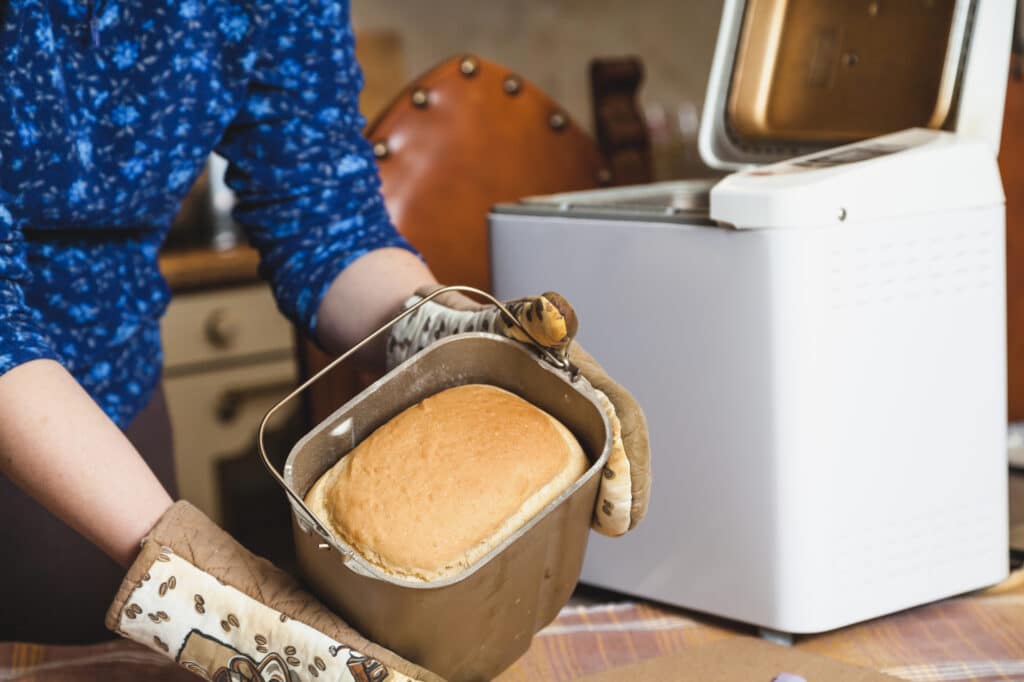
- Don’t forget to turn your loaf out as soon as it’s done. While you may have set your loaf on a delayed timer, if you’re not there to take it out when it’s done, it will continue baking in a hot machine, even after the automatic shutdown. This can result in harder, darker, crustier bread.
Can Regular Flour be Used in a Bread Maker?
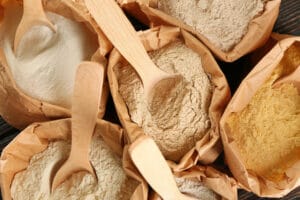 Yes, you can use regular flour in your bread maker. For the best results, we recommend using bread flour as it has more gluten which helps your loaf to rise higher. All-purpose flour is a good enough substitute for most recipes, as it is a blend of soft and hard wheat. While yeast works better with the hard wheat formulas only found in bread flour, it also works with all-purpose flour, and you will still get good results.
Note that you may need to add a little extra flour when substituting bread four with all-purpose flour. Similarly, if you are using whole grain flours, such as rye or whole wheat flour, you’ll also have to up your yeast to flour ratio and add more yeast. Cake flour is not suitable for baking bread as it has a much lower gluten content than regular or bread flour. If you bake bread with cake flour, it is likely to crumble apart.
So, if you have run out of bread flour, you can use regular flour in your bread maker. It probably won’t rise as high, so you may want to look at making dinner rolls or other flatter types of bread and leave the standard loaves until you get your bread flour back in stock.
How to Clean Your Bread Maker
Not only is using a bread maker incredibly easy; thankfully, they are also easy to clean. Remove your bread pan from your machine. As most are non-stick, they are effortless to wipe clean. Some may even be dishwasher-safe but always check your specific model.
You will want to remove the paddle from your pan to wash it separately and ensure that you get all parts that have been in contact with your food thoroughly clean. If you haven’t already done so, wash out your measuring equipment and any attachments.
Leave all washed items to thoroughly air dry, or dry by hand, before reinserting them inside your machine. This will prevent the risk of moisture from creating a short circuit in your bread maker, as well as ensuring it remains in prime condition. If necessary, gently wipe the exterior over with a moist cloth.
Here is a short video which nicely illustrates how to clean your bread maker effectively. Of course, all bread makers will have slightly varying cleaning instructions, but we wanted to show you an example of how simple and easy it can be.
Conclusion
Bread machines are highly convenient, easy to use appliances that allow you to enjoy a high-quality home-baked loaf of bread. Whether you just can’t get enough freshly baked white bread, or you want a more healthy, freshly prepared whole-wheat alternative to the store-bought options, a bread machine makes it possible to enjoy home baking even when on a busy schedule.
Remember to always read through your bread maker instructions and any accompanying documentation and carefully measure out your ingredients in the stated quantities. After successfully mastering the basics, you can move on to making minor alterations and creating the type of loaves you love.
Now that you know everything you need to in order to use a bread machine with confidence, it’s time to put your knowledge to the test and get baking.
P.S. Check out this IG-page if you are looking for some recipe-inspo!
View this post on Instagram
Kelly is an expert in consumer product research, which is very important when it comes to finding the most useful and aesthetically pleasing items for your home. This became her passion after finding it very time-consuming to wade through all the product information online.
She has a keen attention to detail which she brings to her articles, Kelly’s goal is to help you find what you need without spending too much time searching for it.