Last Updated on January 10, 2023
Steaming your clothes while you iron them speeds up the process significantly and also gets wrinkles out more effectively. This means ironing your clothes at home could be easier than you think, especially when using a steam iron.
However, not all instructions that come with a steam iron are that comprehensive and they may still leave you with a few basic questions. That’s why we created this article. It not only explains how to use a steam iron but also covers some basic and pro tips to help you throughout the process.
Before You Begin
Before you start learning to remove creases from your clothes using a steam iron, there are a few things you can do to make the whole process more efficient.
Gather Supplies
First, start by gathering the supplies you will need. This is an essential step when learning how to iron clothes correctly. This will make your efforts more streamlined and will prevent you from having to leave the iron unattended once you turn it on.
 Supplies Needed:
- Iron
- Water
- Ironing board
- Hangers
- Wrinkled clothes
- Optional spray bottle
Getting Prepared
If you haven’t already, read the manual so you can familiarise yourself with the settings, light alerts, buttons, and tank design.
Next, set up your ironing station near an outlet. Make sure the spot your find offers enough space for you to move around the garment and the ironing board freely.
Gather the articles of clothing you wish to iron. We recommend sorting your clothes according to the fabric type so you don’t have to change the temperature back and forth. When you begin, start with the lowest temperature and work your way up.
Ironing with a Steam Iron: Step-by-Step Instructions
1. Add Water to the Tank
Fill the water tank with tap or distilled water up to the maximum fill line. Use either room temperature or cold tap water, not warm or hot water as it has the potential to cause damage to your iron. Also, make sure not to overfill the tank because it can negatively affect the spray and steam function as well.
2. Power Up and Set Temperature
Plug your steam iron into a mains outlet and turn up the heat. Set the temperature according to the fabric you plan on ironing. If you are unsure what heat level is appropriate, many irons have a guide featured on the side. The guide will give you an idea of how much heat is appropriate for a specific fabric. You can also check tags on clothing to determine both their fabric composition and proper ironing temperature.
3. Prepare Clothes While the Iron Heats Up
As you wait for your iron to heat up, spread the first garment out on the ironing board and smooth out the fabric using your hands. Your iron may have a light that turns on or off when it reaches the desired temperature, alerting you it is ready. If your iron doesn’t have an alert light, 3-5 minutes is generally enough time. When the iron is hot, proceed to the next step.
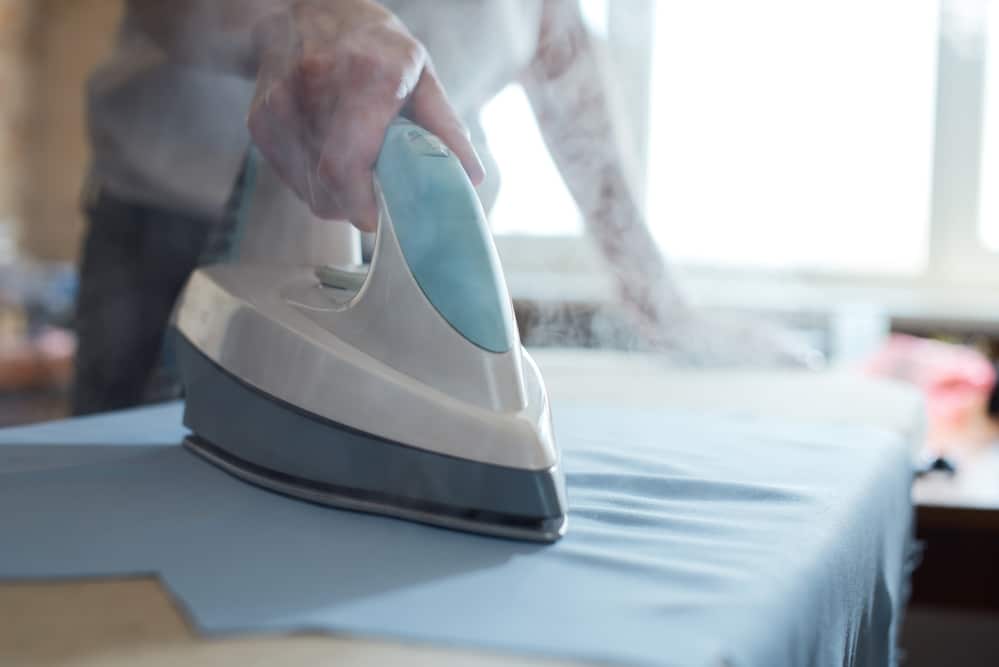
4. Press Wrinkles
To officially begin the ironing process, press your steam iron on top of your clothes moving up and down with the natural grain of the fabric. Steam will automatically be released on most irons as you move around the garment. You can also turn the article of clothing around and reposition it to ensure you get the best results for each part. Keep the iron upright when not actively ironing and always point the iron away from you so as to prevent possible burns.
5. Deep Wrinkles and Enclosures
To tackle deeper wrinkles and creases, press your iron’s spray button down to release extra steam power. However, only do this if the fabric permits getting wet, some delicate fabrics will not. If your iron doesn’t have a spray button you can always supplement by using a regular spray bottle. Don’t overspray the fabric so it becomes wet or you will significantly increase the amount of time it takes to iron your clothes. Ideally, the material will be damp, but not wet. Additionally, take care not to iron on top of buttons, zippers, and other enclosures. Instead, iron them on the opposite side of the fabric to prevent any unnecessary damage to your clothes or your iron’s metal soleplate.
6. Hang Clothes After Ironing
Place each piece of clothing on a hanger immediately after ironing to avoid further wrinkling and keep the fabric smooth. It is ok if the garment is still slightly damp, it should air dry quickly.
7. Repeat Process
Repeat the ironing process on each garment until your work is done.
8: Power Down and Let Cool
Unplug your iron and be sure to let it cool completely before proceeding to the last step. You can check the heat level on the soleplate quickly with the back of your hand to make sure it is cool but only after waiting for at least 10-15 minutes.
9. Empty Water Tank and Put Away
When completely cool, empty all of the water from the iron. Finally, store the iron and ironing board and your task is complete.
Other Things to Consider
That’s all for our steam iron instructions. The following sections aim to answer questions you may still have about steam irons. We will also share some tips that we recommend you keep in mind when ironing your clothes.
Benefits of Using a Steam Iron
Using a steam iron on your clothing at home is a great way to avoid spending money on professional pressing or dry cleaning services. Ironing your clothing at home also allows you to remove creases a garment at a moment’s notice, no need to drop it off and wait for one or more days.
Ironing with a steam iron can also reduce the time it takes to iron your clothes compared to a traditional iron. The steam and heat actively work to smooth out wrinkly clothes faster than heat and pressure alone. So, is it better to use a steamer or an iron? We think a steam iron is the best way to go and in fact, almost all irons on the market today are steam irons because of how great they work.
Steam Iron Pro Tips
 The following tips can seriously upgrade your ironing skill level, help you speed up the ironing process, protect your iron, and will also prevent potential damage to your clothes as well.
- It is best to iron your clothes right after they come out of the laundry. Ironing them straight away will prevent deep creases from setting in the material and speed up the process overall.
- Use distilled water when steaming. Using distilled water in your iron prevents the build-up of minerals in the steam vents and on the metal soleplate, which can often be caused by tap water. The use of distilled water means you don’t have to descale your steam iron all the time.
- Heavier steam irons make ironing each wrinkle easier thanks to a little help from gravity. If you don’t already own a steam iron, look for a heavier model to make ironing clothes easier.
- The more steam vents an iron has, the better. More holes to emit steam on an iron means better steam distribution across your clothes resulting in more efficient functioning.
- Don’t store water in your steam iron. Not only can this lead to spills, but the water inside can also leave rust-coloured marks on your clothes if it is left in the iron for too long. If you want to prolong the lifespan of your iron, water should be discarded after each use.
- Up and down motions with the iron are best. Many people were taught to use small circular motions while ironing but they have the potential to stretch out some more delicate fabrics.
- Delicate fabrics may benefit from a cloth barrier. Utilising a pressing cloth, like a towel, between the iron and the fabric could prevent damage to delicate fabrics such as silk.
- Use a chair to help with larger items like sheets and curtains. Utilising a chair for support and for draping extra material over may help prevent wrinkles from developing after the material has already been ironed.
- Keep a spray bottle handy. Equal parts vinegar and water in a spray bottle will help remove stubborn creases and clean yellow marks in the armpits or around the collar. It will also reduce shiny spots on the fabric that can be caused by the iron.
- Don’t iron over buttons or zippers. Rigid closures can potentially damage the metal soleplate or melt the buttons, some at a surprisingly low temperature. Always flip the fabric over before ironing zippers or buttons. Or, better yet, use a pressing cloth to form a barrier between the abrasive materials and the metal soleplate.
Conclusion
You have come to the end of our article. By now you should know everything you need and more on how to use a steam iron. We know we gave you a lot of information, but you don’t have to memorise it all. Feel free to reference this article any time you need a refresher or encounter a snag.
Just remember to pay close attention to the heat setting, hang your clothes up immediately after ironing, and never place the iron on the ironing board plate down when not in use, and you will be ironing like a pro in no time.
Do you have steam ironing tips to getting clothes crease-free in less time? Let us know in the comments.
Emily is a woman of many talents. She has a B.A. in English and enjoys writing. Emily loves accessorising her home with quality products that not only serve a purpose but also enhance the overall convenience and tranquillity of her living space; there’s nothing like coming home to your own personal sanctuary after a long day! She loves anything that can make life easier or more comfortable—from dishware to furniture to lighting fixtures.