Last Updated on February 23, 2023
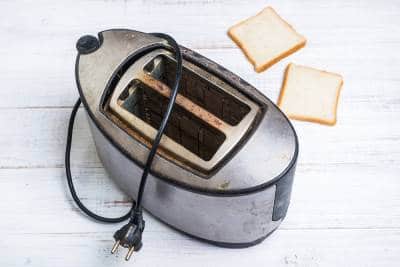
Knowing how to clean a toaster is important from a health point of view. Those crumbs sitting in the crumb tray will remain there for ages and rot, but who wants that?
Cleaning a toaster can sometimes be viewed as a difficult thing to do. We look inside the toaster, see those remaining crumbs, and wonder how we will ever get them out. Well, it’s easier than you think, and that’s what we will focus on in today’s article.
Cleaning the Interior
Let’s explore the various cleaning options for cleaning the inside of your toaster oven.
Method 1: Removing the Crumb Tray

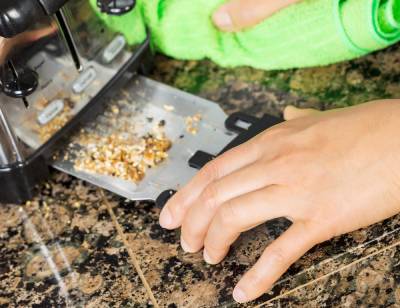
The first step when you want to clean a toaster is to remove the crumb tray. Most toasters will have one, and it should pull out without too much difficulty.
Once removed, shake the crumb tray, and turn it upside down. The best part about the removable crumb tray is that you can easily wash it with warm, soapy water. Just keep in mind to properly dry it before putting it back into your toaster.
For washing it, use a little dishwasher liquid and a damp cloth or sponge. You can also just throw it in your sink and wash it like everything else. However, just make sure you use a dry cloth after it’s washed. You want all the water off the tray before you put it back.
Having a dry crumb tray is important, or the new crumbs will simply sit and stick to it, making it harder to then clean it again in the future.
Method 2: Turn the Toaster Upside Down
Another thing you need to do when you want to clean a toaster is to turn the toaster upside down. This allows you to give it a shake to remove as many crumbs inside the toaster section.
The inside of a toaster can become covered in crumbs, and they get deep down. Any leftover food is something that needs to be removed. Because of its location, you cannot just wipe it away, so those crumbs tend to stay there.
However, the power of gravity is often the best way to do this, and a good shake can work wonders.
Method 3: Using a Brush
One option to remove those crumbs from inside the toaster is to use a pastry brush or something else that is pretty long and thin. Make life easier for yourself by starting at the top and brushing down to the bottom.
As you have removed the tray for collecting all those crumbs, you should find they just fall down and out when you clean your toaster. So, be prepared for a mess to appear underneath when cleaning.
But here’s an extra tip. Make sure the brush is dry when you wipe the bread crumbs away. If it’s damp, they will stick together and make it harder to clean.
Method 4: Cleaning Off Cheese
So let’s say you have some cheese stuck on the inside, and you wonder which cleaning methods will work in this instance. It is a bit tougher to just wipe this clean, but we have a method that works well.
First, unplug the toaster before cleaning. It’s amazing how often people forget this, as we are so used to just leaving the toaster plugged in.
Next, this is not something that will come off with just cloth. Instead, you need either a spatula or a wooden spoon. The aim is to prize off the solidified pieces of cheese left behind. Simply pop off the pieces of cheese from the heating elements, and then use a soft toothbrush to scrub off the remnants.
Regular cleaning of your toaster will certainly make life a lot easier. Once you have prized everything off, allow your toaster to air dry, and everything will be perfect.
Cleaning the Outside of Your Toaster
Understandably, the outside of your toaster will get a bit grubby over time, and it becomes even more noticeable when you have one with a chrome effect. It can effectively lose so much of its shine at one point, and we want to get that back.
You don’t need to worry about deep cleaning your toaster if it is only lightly soiled. A simple wipe with a microfibre cloth can make a huge difference. However, if you want to go an extra step, then a damp sponge with some dishwashing liquid can make a real difference.
But what if there are some marks? That’s where you need to become a bit more involved in the cleaning, and we have a few helpful tips to make the process a lot easier. Also, it means you won’t need to buy a new toaster.
Dealing With Brown Stains

If you have brown stains on the outside of your toaster, then don’t worry. The first thing to try is to wipe with a cloth. Don’t put your toaster in the sink, though, as it can become a fire hazard.
These food spots on your toaster may be eased off with a damp sponge, but that’s not always the case.
So, if you still have some particularly stubborn marks left after cleaning the exterior with dish soap, get a toothbrush and some baking soda. Dip the toothbrush in the baking soda, and use that as your new cleaning solution.
Since the outside of your toaster is wet, the baking soda won’t scratch the surface, but it will help remove those stains from your toaster. Keep scrubbing until everything is gone. Then, rinse down with a clean cloth and dry.
A Chrome Toaster
If you have a chrome toaster, you need to be more careful to not tarnish the exterior. In this instance, we recommend using white vinegar rather than soapy water. It should be mixed with a ratio of 1:1, as only a few drops won’t do anything.
The key here is to leave the vinegar solution on the surface of your toaster for several minutes before wiping it off. That allows the vinegar to break up the stain, similar to cleaning ceramic hobs. And it should then be easy enough to remove it.
How Often?

Finally, how often should you look at cleaning your toaster or your toaster oven? Well, it all depends on how often you use it. If you are a fan of toasting bread and use it every day, you may want to clean your toaster at least once a week.
Also, you may want to gently brush the crumb tray every couple of days just to make life a lot easier for yourself. Keeping a clean toaster is easy to do, and when wiping down your kitchen, why not just use a soft cloth and wipe over the exterior of your toaster at the same time? It takes just seconds to do, yet it makes a difference even when giving your toaster more of a deep clean.
Remember that cleaning toaster ovens is done the same way as pop up toasters. Just make sure you don’t stick your fingers inside just after using it. Instead, allow it to cool for a significant period before you start cleaning.
Getting Into a Cleaning Routine
And that is how to clean a toaster. You have several steps or approaches to consider, but always remember to unplug it first before cleaning your toaster. Some warm water and a damp cloth can remove so much. But be prepared to use some elbow grease in the cleaning process for that burnt-on melted cheese when cleaning your toaster.
Overall, knowing how to clean the inside of a toaster is straightforward and something you should get used to, as you should clean your toaster regularly.
How about you? How often do you clean your toaster? Let us know if you have any extra cleaning tips to share!
Paul is the type of person who never met a problem he couldn’t fix. He can always be found tinkering with something in his house, even if it isn’t broken! His tips and tricks are often shared on our site. He’s the one you call when something breaks because he has been known to improvise fixes for everything from leaky faucets to malfunctioning dryers.

