Last Updated on January 10, 2023
Are you wondering how you can install an instant boiling water tap in your kitchen or office?
An instant boiling water tap gives you instant access to hot water, which can be used to cook, make hot beverages, and wash utensils.
However, before you start enjoying such benefits, you have to install a boiling water tap. While the whole process might seem challenging and daunting, hot water tap installation is a simple process that can be achieved in a couple of hours.
If you are hoping to learn how to fit a boiling water tap, you are in the right place. In this post, we are going to take you through the different steps that you should follow to get your boiling water tap up and running. We are also going to show you the different tools that you require to install a boiling water tap.
Different Tools That You Will Need
These are some of the tools that you require to install a boiling water tap:
Drill
This tool will help you drill a hole in your sink. A drill might be suitable for you if you are planning to fit a boiling water tap in addition to your current tap.
Drill bit
A drill bit works hand in hand with a drilling machine to help you drill holes of different sizes.
Bucket
If you want to replace your current kitchen tap with the best boiling water tap, you’ll need a bucket. A bucket collects some of the water that might drain from the tap during the replacement process. It also helps you keep your working environment dry and clean.
Spanner
A spanner helps you tighten various connections in your boiling water system. If you have tight connections in your boiling system, you are less likely to experience water leakages and having a spanner deals with loose connections.
Steps to Follow While Installing a Boiling Water Tap
While boiling water taps are available in different styles and sizes, they are installed in the same way. Not to mention, they follow the same installation principles. You should follow these steps while installing a hot water tap in your kitchen or office:
Step 1: Turn Off Your Mains Water Supply
Head over to your gate valve and turn off the mains water supply. Make sure you run the cold and hot water taps for a short period. This drains all the water that might have been left in the pipes. Once you finish doing that, open the valves on your taps.
Step 2: Find a Spacious Spot Where You Will Place Your Boiler Tank

Look for a spacious spot where you will place the boiler tank. Not to mention, boiler tanks are available in different sizes so you should get one depending on the amount of water you use per day.
A boiler can be placed under your kitchen sink, in a cupboard or within something else that conceals it. The water tank size should be small and compact. If you are planning to place your boiler in a cupboard, you should make room for the boiler by removing some of the items that might have been stored there.
Once you know when you are going to store your tank, place it in a convenient position that is close to the hot and cold water feed. It should be close to a safe plug socket that supplies electricity to the boiler.
Step 3: Drill a Hole in the Sink
Create a dimple on the sink that will mark where you want to attach the tap. This dimple will also facilitate the drilling of the hole for the dispenser.
Drill a hole based on the instructions that the manufacturer shared with you. Since instant boiling water taps have different diameters, you should read the manual that was provided by the manufacturer before you drill a hole. This makes it much easier for you to determine the diameter of the hole that you are about to drill.
You can use various tools to drill a hole in the sink. Once you finish drilling a hole with a perfect diameter, attach a seal ring on the underside of the hot water tap dispenser.
Step 4: Fitting Your Tap on Your Sink
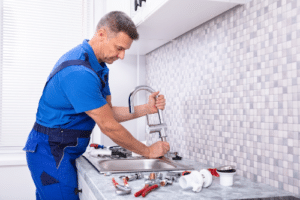
Pass the hot and cold water feed through the hole that you drilled earlier. Feed any extra wiring through that hole. After that, secure the hot water tap on the hole by following the instructions that the manufacturer shared with you.
You can do this by using a spanner and some grease.
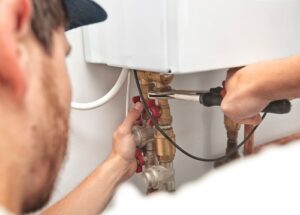
Step 5: Connect the Boiler
Once you fix your tap to the hole that you had drilled earlier, connect the tank to the tap. Since many hot water taps have different specifications, you should follow the manufacturer’s instructions as you are connecting the water tank to the boiling water tap.
Fitting a water tap in a mains water supply that exceeds the tap’s water pressure threshold is not advisable. To reduce the pressure of cold water, you should insert a pressure reducing valve in the connection system. If there is too much pressure in the system, the boiling system might have some defects. Not to mention, hot water should be dispensed at very low pressure — this prevents water from splashing back too much that could cause harm.
Step 6: Check For Leakages
Now, before you proceed to the next step, you have to check if the boiler is connected properly to the boiling water tap.
To test whether the boiler works efficiently or not, you have to turn on your mains water supply. Open all the valves and allow the water to flow to your boiler.
After that, open the boiling water tap. This makes it possible for water to pass through your boiler. Hold the knob for a short period to open the tap completely. In about 90 seconds, your water tank will be full of water. Once the boiler becomes full, water will start flowing through your boiling water tap.
Take a look at different parts of the boiler system to check for defects.
If you notice any leakage in your system, you should switch off the mains water supply system, then work on the spot that has a defect. In most instances, leakages are brought about by loose connections in your boiling system. Such connections can be easily fixed by various tools such as a spanner.
Now, if your boiler has a leakage issue, you should contact the manufacturer and explain the problem.
Step 7: Turn On Your Boiler
Once you confirm that your boiling system is working efficiently, you can plug your boiler into a source of electricity and determine the most suitable temperature for heating water. You can also use the temperature dial to set the boiling point of water. Taps come with a pre-set temperature that ranges from 98 °C to 99 °C.
Installing a boiling water tap is all about following the instructions that are offered by the manufacturer.
Most boiling water taps include a guide that gives you insightful information, which helps you install the whole boiling system. With a boiling water tap, you can get hot water for cooking or making beverages.
Safety Feature to Include
Boiling water taps are incomplete if they don’t have a safety feature that protects your children from hot water in your kitchen. Due to this, you have to install a safety accessory that prohibits certain users from using boiling water.
These are some of the safety features that you can install in your kitchen boiling water system:
Red Safety Clip
This is the most basic safety feature. It should be available in multiple boiling water taps. As the name hints, it is a coloured clip that prevents boiling water taps from dispensing hot water. Not to mention, some clips have a certain colour that indicates whether the tap dispenses hot water or not. With this feature present in your boiling tap, it is quite easy to differentiate between a tap that dispenses cold water and the one that dispenses warm water.
Handle Lock
Handle locks are available in different designs that offer you safety options. Most handle locks have a specific opening mechanism that triggers the flow of water. For instance, some boiling taps come with a small button that should be pressed for a short period of time before you turn the knob. If you don’t press it first, water will not flow through the tap. Not to mention, children might be unable to open a boiling water tap that has a handle lock.
If you want to improve the safety features of your instant boiling water tap and take it to the next level, you can use both accessories in your boiling water system. A safety system with two safety features is referred to as a two-stage system. It is one of the safest systems that can be installed in your boiling water unit. If children manage to get past the first level of safety, they won’t be able to get past the second level.
Finishing Touches

Since you already know how to fit a boiling water tap, take a look at different parts to check for defects in the boiling system and be sure to complete regular maintenance to ensure it’s longevity.
If you live in a hard-water area, you should install a filter in your boiling system. Not to mention, filtered water generally tastes better, too. Filters should be replaced after 6 months to improve the longevity of your boiling water tap and so you can enjoy hot or cold filtered water for as long as possible. Check that the filters you need are easy to source when choosing so it won’t be difficult to replace when the time comes.
It is also worthwhile to note that instant hot water taps are available in different designs that offer you hot and cold water options— 3-in-1 tap, 4-in-1 tap, and a mixer tap. Boiling taps also have different finishes such as chrome finish, stainless steel, and titanium, so make sure you have one that matches your current sink.
Get Your Boiling Water Tap Up and Running
If you follow the steps mentioned above on how to fit a boiling water tap, installing an instant hot water tap becomes a piece of cake. While different taps have different specifications, the tap installation process is still the same. Make sure you read any instructions that come with your boiling water tap thoroughly before making any changes to your kitchen.
Let us know how you get on!

Ian loves everything that revolves around the home improvement niche. He loves trying out new home appliances. He has also handled a lot of equipment and has a lot of insight. Plus, he’s worked on various home improvement projects that became a success. If Ian isn’t busy working on his latest project, you can find him reading up about another one!