
Last Updated on January 30, 2023
Are you ready to take on the challenge of fixing a hammer drill? It can seem daunting, but it doesn’t have to be. With this blog post, we’ll provide some tips and tricks for troubleshooting common problems with your hammer drill, replacing parts if necessary, and maintaining it in good condition so that you don’t find yourself needing to fix a hammer drill again anytime soon. Read on for more information about keeping your tool in tip-top shape.
Table of Contents:
- Troubleshooting Hammer Drill Problems
- Replacing Hammer Drill Parts
- Maintaining Your Hammer Drill
- Conclusion
Troubleshooting Hammer Drill Problems
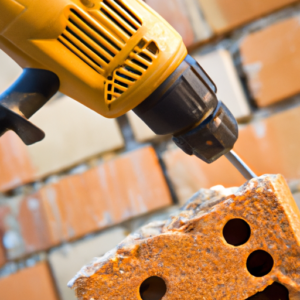
Hammer drills are an essential tool for many DIY projects. Unfortunately, they can sometimes experience problems that make them difficult to use. To help you troubleshoot your hammer drill issues, here are some tips on what to look out for and how to fix them:
Check the Power Source
The first thing you should do when troubleshooting a hammer drill is to check the power source. Make sure it’s plugged in correctly and has enough power running through it. If not, try using a different outlet or extension cord if necessary. You may also want to test the voltage of your power source with a multimeter just to be sure there isn’t an issue with the wiring itself.
Inspect the Drill Bit
If everything looks good on the power side of things, then inspect your drill bit next. Make sure it’s firmly attached and free from any debris or damage that could cause it to malfunction while drilling into materials like wood or concrete. Also, check for any signs of wear and tear, such as chips or cracks, which could indicate that it needs replacing soon before further damage occurs during use.
Examine The Chuck
Finally, examine the chuck – this is where you insert your drill bit into place, so make sure there aren’t any obstructions preventing its proper functioning, such as dirt buildup or rusting components inside of it due to lack of maintenance over time. Additionally, ensure that all screws holding down the chuck are tight so nothing slips out during operation, causing further problems later on.
Once you have identified the issue with your hammer drill, it is time to move on to replacing any parts that may be causing the problem.
Replacing Hammer Drill Parts
Changing the parts of a hammer drill can be a daunting task, but with the right tools and knowledge, it doesn’t have to be. Whether you need to replace the chuck, drill bit or power cord, here are some tips on how to do it safely and effectively.
Chuck
The chuck is an important part of your hammer drill as it holds the bits in place while drilling. To remove the old chuck from your hammer drill you will need two wrenches – one for holding down the spindle lock button and another for unscrewing the nut at its base. Once this is done, simply slide off the old chuck and replace it with a new one before tightening up both nuts again using your wrenches.
Drill Bit
Replacing a worn-out or broken drill bit is easy enough when you know what to do. Firstly make sure that your hammer drill is switched off before removing any bits from its chuck by gripping them firmly between thumb and forefinger, then pulling them straight outwards until they come loose. You can then insert your new bit into place in much the same way – pushing gently until secure before switching back on again once finished.
If you find yourself needing to replace an old or damaged power cord, there are a few things worth considering. Firstly, always ensure that all plugs are disconnected from their sockets prior to starting work so as not to risk electric shock. Secondly, make sure that all wires are connected correctly according to their colour coding (black = live/red = neutral); otherwise, this could cause further damage down the line if not done properly. Finally, check for any signs of wear and tear, such as frayed cables, which should be replaced immediately if found present.
Replacing hammer drill parts can be a daunting task, but with the right tools and knowledge, it doesn’t have to be. Now let’s look at how to maintain your hammer drill for long-term use.
Maintaining Your Hammer Drill
Maintaining your hammer drill is essential for keeping it running smoothly and safely. To ensure that your tool lasts for years to come, here are some tips on how to properly maintain it:
Cleaning
Regularly clean the outside of the hammer drill with a damp cloth or brush. This will help keep dust and debris from clogging up the internal components of the tool. Additionally, you should also make sure to regularly check inside the chuck for any dirt or debris that may have accumulated over time. If there is anything present, use compressed air to blow out any particles before continuing with maintenance.
Lubrication
Lubricating moving parts such as gears and bearings can help reduce friction, wear, and tear on your hammer drill’s components over time. Make sure to use an appropriate lubricant designed specifically for power tools when doing this task; otherwise, you risk damaging your tool in the long run.
Storage
When not in use, store your hammer drill in a cool dry place away from direct sunlight or moisture sources like water pipes or sinks. Doing so will prevent rusting of metal parts which could lead to malfunctioning down the line if left unchecked. Additionally, always make sure that all electrical cords are disconnected prior to storage as well.
By following these simple steps, you can be assured that your hammer drill will remain reliable and safe throughout its lifetime, no matter what projects you take on.
Conclusion
Fixing a hammer drill can be a daunting task, but with the right knowledge and tools, it doesn’t have to be. With this guide, you should now know how to troubleshoot common problems, replace parts when necessary and maintain your hammer drill for optimal performance. So don’t let a broken hammer drill stop you from getting the job done – just remember these tips on how to fix a hammer drill.
Paul is the type of person who never met a problem he couldn’t fix. He can always be found tinkering with something in his house, even if it isn’t broken! His tips and tricks are often shared on our site. He’s the one you call when something breaks because he has been known to improvise fixes for everything from leaky faucets to malfunctioning dryers.