Last Updated on January 30, 2023
Are you ready to take on the challenge of removing tiles with a hammer drill? It’s not as daunting as it sounds, and once you know what to do, it’ll be like second nature. Removing tiles with a hammer drill may sound intimidating but fear not – this guide will walk you through every step so that before long, your walls or floors will look good as new. Read on for tips and tricks about how to use a hammer drill safely and effectively when tackling those pesky tiling jobs.
Table of Contents:
- Preparing the Area
- Using the Hammer Drill
- Clean Up
- FAQs in Relation to How to Use a Hammer Drill to Remove Tiles
- Conclusion
Preparing the Area
Before you start any project involving tile removal, it’s important to take the necessary steps to prepare the area. Start by removing all furniture and other items from the room. This will give you more space to work in and help prevent damage to your belongings. If possible, move furniture into another room or cover it with a drop cloth or plastic sheeting.
Next, cover any surfaces that may be damaged by debris during the tile removal process, such as countertops, cabinets, walls, etc., with protective materials like cardboard or newspaper. Make sure these are securely taped down, so they don’t shift while you’re working. You should also protect yourself by wearing safety glasses and gloves when handling sharp objects like chisels and hammers during demolition projects.
Finally, check that all electrical outlets are off before plugging in any power tools; this is especially important when using a hammer drill which can cause sparks due to its high-speed rotation action.
Using the Hammer Drill
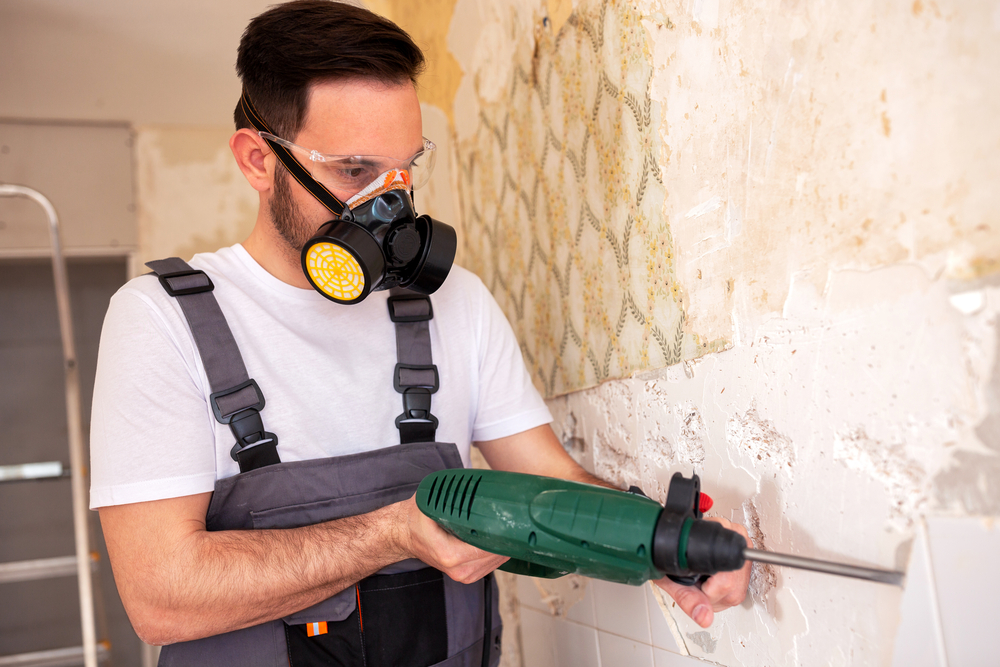
Before beginning any project, it is important to make sure that you have the proper safety equipment. Wear protective eyewear and gloves when using a hammer drill. Make sure your workspace is clear of debris and objects that could be damaged by flying particles or sparks from the drill bit.
To prepare for drilling into tiles, use masking tape to mark off where you will be drilling so that you can stay within the lines of your intended area. It’s also important to ensure that there are no wires or pipes behind the tile before starting, as these could cause serious damage if struck with a hammer drill bit.
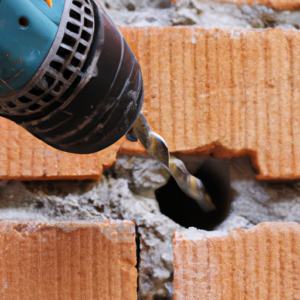
Once everything is prepared, begin by setting up your hammer drill on its lowest speed setting and attach a masonry bit suitable for ceramic tile removal. With light pressure, start drilling into each marked section until all four sides of each tile have been drilled through at least halfway through their thickness. After this has been done, increase the speed slightly and continue drilling until you feel resistance from beneath – this indicates that you have reached whatever backing material was used in installation (such as cement board). At this point, remove your hand from the trigger switch and allow the tool to spin freely while still applying slight downward pressure against it; doing so should help break apart any remaining adhesive holding onto what remains of each tile piece which should then easily come away with gentle prying motions using either a flat head screwdriver or chisel depending on how much force is needed.
Clean Up
After completing any project, clean-up is often one of the most important steps. It’s easy to forget about it in the excitement of a job well done, but it can make all the difference when it comes to getting your home and garden looking its best.
When removing tiles from walls or floors, there are a few things you need to consider for proper clean-up. First, dispose of any debris that may have been created during removal. This could include broken pieces of tile or mortar that have come loose while chipping away at old grout lines. Make sure these materials are disposed of safely and properly so they don’t cause harm to anyone who might come into contact with them later on.
Next, vacuum or sweep up any dust particles left behind after tile removal. Vacuuming is usually preferable as this will help remove even small bits that may be stuck in crevices between floorboards or other hard-to-reach areas where sweeping won’t do much good. If vacuuming isn’t an option due to a lack of power outlets nearby, then use a damp cloth instead – just make sure not to get too close to liquids as this could damage underlying surfaces like wood floors if not done carefully.
Finally, check around for stray nails and screws which may have become dislodged during tile removal. These should be collected and disposed of separately from other debris since they pose more potential hazards than regular waste material does. Once everything has been cleared away properly, you can move on to whatever project you had planned next without worrying about leaving anything behind.
FAQs in Relation to How to Use a Hammer Drill to Remove Tiles
What kind of hammer drill do I need to remove tiles?
When removing tile, you will need a hammer drill with an SDS or Spline drive bit. This type of bit is designed to break through the hard surface of tiles and provide enough power to remove them without damaging the underlying material. It’s essential to choose a hammer drill that has sufficient torque for your project, as well as one that can handle the weight of the tile you are trying to remove. Additionally, it’s best practice to use safety goggles when using any power tool. Finally, make sure to read the manufacturer’s instructions carefully before using any tool.
Can you use an SDS drill to remove tiles?
Yes, you can use an SDS drill to remove tiles. It is an effective and efficient way of removing ceramic or porcelain tiles from walls and floors. The SDS drill has a special bit that allows it to penetrate the tile surface without damaging the underlying substrate. When using this tool, make sure to wear safety goggles and gloves for protection against flying debris. Additionally, ensure that you work in a well-ventilated area, as dust particles will be created during the process. With these precautions taken into account, you should have no problem safely removing your tiles with an SDS drill.
Is a rotary hammer good for removing tiles?
Yes, a rotary hammer is an effective tool for removing tile. It uses a combination of rotation and percussion to break up the material quickly and efficiently. The drill bit used with the hammer should be appropriate for the type of tile being removed. For example, masonry bits are best suited for ceramic tiles, while carbide-tipped bits are better suited for porcelain tiles. Additionally, it’s important to wear safety gear, such as eye protection, when using a rotary hammer in order to protect yourself from debris that may fly during use.
Conclusion
Using a hammer drill to remove tiles is an effective way of replacing old or damaged tiles. With the right safety precautions, preparation and technique, you can successfully complete this task in no time. Don’t forget to clean up afterwards and dispose of any debris properly. Now that you know how to use a hammer drill to remove tiles, why not get started on your next project?
Paul is the type of person who never met a problem he couldn’t fix. He can always be found tinkering with something in his house, even if it isn’t broken! His tips and tricks are often shared on our site. He’s the one you call when something breaks because he has been known to improvise fixes for everything from leaky faucets to malfunctioning dryers.