Last Updated on January 17, 2023
Waste disposal units are amazing appliances to have in your kitchen. They improve your waste disposal process and can also have a positive environmental impact. People often assume that waste disposal units require professionals to install them. However, in this guide, we look at how to install a waste disposal unit without the need for a plumber.
What Does a Waste Disposal Unit do?
First, it is important to comprehend what waste disposal units do. Understanding how they work gives you insight into the installation process and what is required.
A waste disposer has several key components, including:
- The unit housing
- A kitchen sink connection
- A grinding system
- An outlet pipe
- A power source
A waste disposer fits underneath most sinks and connects to the plug hole. The housing of the waste disposer contains a grinding mechanism: this could be a series of blades or knives or a grinding plate.
This mechanism is what grinds food waste, from fruit stones to chicken bones, into fine particles. The fine particles then pass through the system and into the outlet pipe. This pipe connects to your existing waste pipes. Thus, the food waste passes harmlessly into your drains – instead of stinking up your garbage bins!
From this, you should be able to see the different components of the installation. Firstly, you must secure the waste disposal unit to your sink and make a watertight connection.
Secondly, you must connect waste pipes so that the food waste can pass somewhere. Thirdly, waste disposal units require a power source. As a result, depending on the model, you may also have to wire it and attach it to a plug.
How to Install a Food Waste Disposal Unit: A Simple Guide
We have discussed what waste disposal units do and their common installation components. Now we can look at the actual steps involved.
This is a lengthy process, and we advise setting aside a decent amount of time to install your waste disposer properly. Generally, you can install most waste disposal units in a few hours.
Step 1: Read the Instructions!
Most waste disposal units come with manufacturers’ instruction booklets. These instructions should include a detailed diagram of the disposal unit: make sure you study the diagram and the unit itself to understand where the connections are.
Hopefully, the instructions will also include details on the unit’s operation and a complete fitting guide. This guide should also be read and understood fully. Don’t skim-read it!
Also, during the process, make sure that you keep the fitting guide handy and refer back to it as often as needed.
Step 2: Turn Your Water Off
At some point, you will have to test the unit and check that the connections are watertight. However, you do not need to try this until it is completely installed! So, to avoid any potential leaks and water damage, we advise turning your water supply off before doing anything.
To turn your water off, you need to access your shut-off valve. The exact location will vary from household to household, but in most instances, it is commonly found next to your water meter.
These shut-off valves usually have a universal design. Therefore, once you have found it, simply turn it clockwise: this should effectively stop your water supply from reaching your sink. You can, of course, test this by turning your taps on.
Step 3: Prepare Your Sink
The next step is preparing your sink. First, remove any existing waste trap from your sink and waste pipe. Next, remove the existing outlet from your sink (i.e. the plug). These items must be removed so that you can fit the disposal unit in place.
Once you have removed these items, we advise cleaning the surrounding areas. Often you will find excess sealant surrounding the connections. Make sure this is scraped away and removed to give you flat and clean surfaces to work with for the new unit.
Don’t dispose of the old waste trap and pipes away; instead, store them somewhere safe. If you want to remove the disposal unit in the future, you can always revert back to the original sink setup.
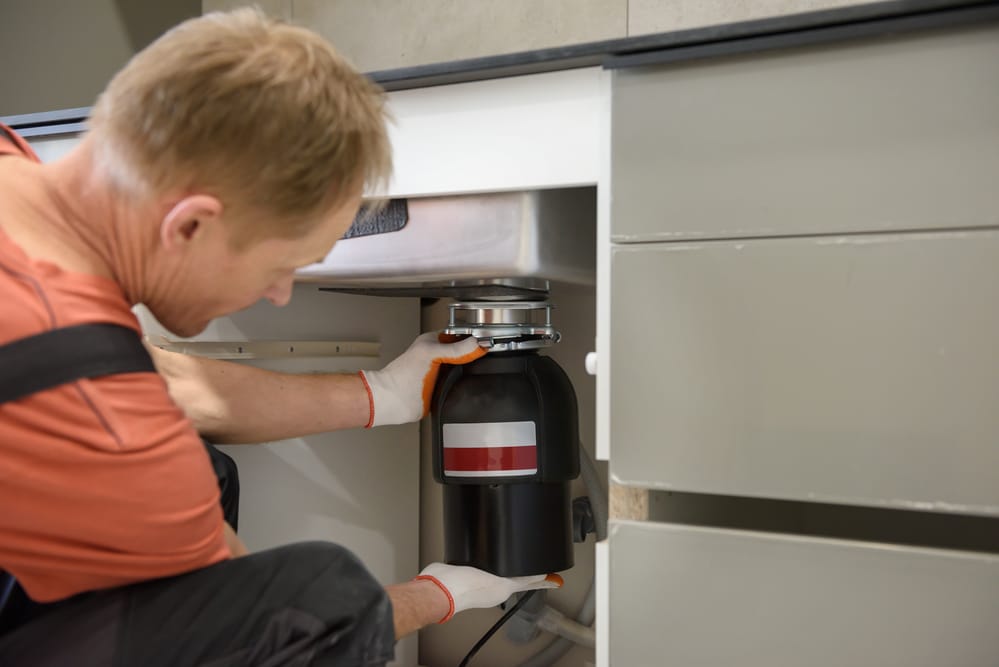
Step 4: Attach the Waste Disposal Unit
With the sink prepared and the waste trap removed, you can fix the unit in place. In most instances, you will be connecting the unit to a standard 90mm sink outlet. However, you may need an adaptor for a UK plug. We advise checking the mounting system of the food disposer before buying it to make sure it fits with your sink.
The unit is typically attached via a mounting bracket with a flange. This mounting system usually connects both sides of the waste trap outlet. Follow the manufacturer’s instructions carefully for this part.
You may need to secure the connection in place using sealant or putty. Alternatively, it may be a simple locking system that requires no adhesive. Make sure that the connection is tight and that the unit cannot move easily. During operation, the unit will vibrate, and thus any loose connections could work the unit free and cause leaks.
Step 5: Connect the Waste Pipe
Once the waste disposal unit is secured, you must connect the waste pipe.
Units like these have a waste pipe that needs to be connected to the existing pipe of your sink: this allows the food waste to be flushed away. This is often the same pipe that your dishwasher outlet is also connected to.
Usually, the waste pipe system will use a 40m or 50mm pipe and connection, which is relatively standard and should fit your existing pipework without too much hassle.
The pipe is typically attached to the existing drain system using a gasket and screws. The instructions should clearly show how the pipes connect. When installing the pipe, be careful not to over-tighten anything as you could risk damaging the material and cracking it.
It is preferable if your pipe connects to the same outlet that your dishwasher connects to because wastewater from the dishwasher can help flush the outlet pipe and make sure the food waste is disposed of properly.
Step 6: Wire the Waste Disposer
This step is not guaranteed and depends on the device you are installing. Some waste disposal units have a pre-installed power cable: in these cases, you simply plug the unit into an existing power outlet.
However, many waste disposal units require wiring, and some require hard wiring. Depending on the model and style, you may have to fit a 13amp fused connection unit or a plug — this should all be explained in the manual.
If you are not comfortable doing any electrical maintenance, we advise looking beforehand and choosing a waste disposal unit with a pre-installed electrical connection. It may cost a little more, but it makes this process easier.
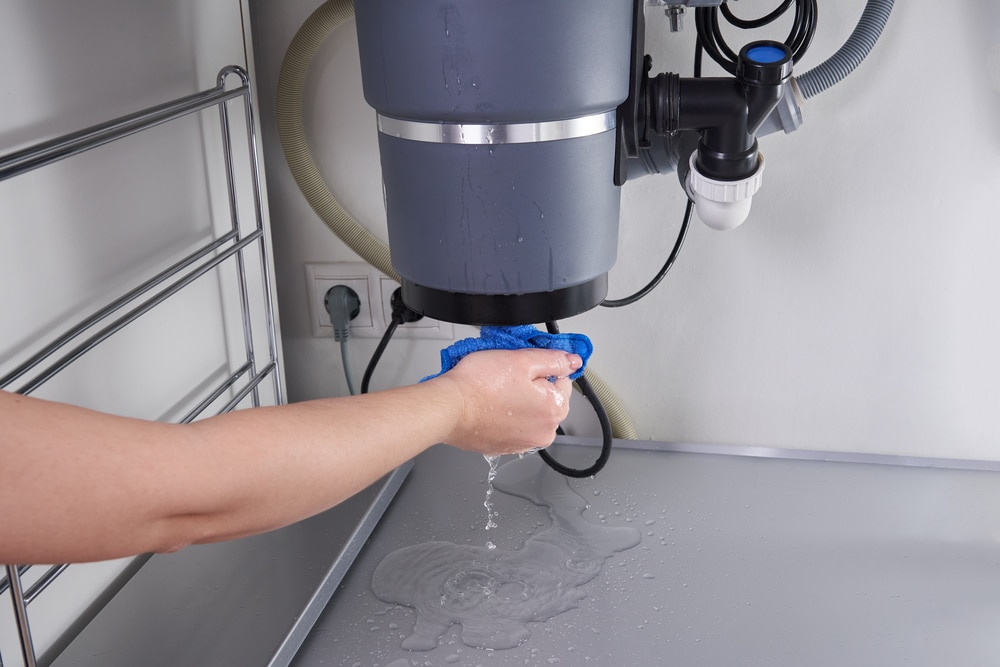
Step 7: Turn Your Water on and Test the Unit
Your disposal unit should now be connected in all the right places and have power. You can now turn your water supply back on. To do this, simply turn the shut-off valve counterclockwise to the position it was in before. We advise testing the unit first before putting it into full action.
First, test it simply by running your taps and letting a small amount of water flush through the system. Keep your kitchen sink doors open, and watch for any drips or leaks as the water flushes through. Hopefully, everything should be watertight.
Second, you can test the grinding mechanism and drainage pipe. Cut up some small pieces of food waste and place them into the opening. Switch the waste disposal unit on. If you have wired it properly, the grinding mechanism should work, the food should be ground, and it should flush into the drainage pipe!
Waste Disposal Unit Installation FAQs
Can Waste Disposal Units Cause Leaks?
Yes! A food waste disposal unit is attached directly to your sink. It also connects to your waste pipe. This means there are multiple connection points where leaks could occur.
As a result, you must make sure all connections are tight and secure.
After installation, it is also essential to assess the new waste disposal unit to ensure none of the pipes or connections is leaking — don’t simply leave it and assume it is working properly.
Is a Food Waste Disposal Unit Dangerous to Install?
Not overly. There is, of course, potential danger when installing any type of electrical connection. However, providing that you work safely and do not get the wires or socket wet, there should be no problem.
Installing a Waste Disposal Unit Correctly
It is possible to install waste disposal units entirely by yourself. Providing that you are careful, turn your water off beforehand, and follow the instructions carefully, you should be able to complete the installation without too much fuss! However, if you are unsure about a DIY installation of a waste disposal unit in your kitchen, we advise contacting a plumber or the manufacturer.
If you found this guide helpful, please share it with your friends and family. For more kitchen appliance installation tips, check out our website every day!
Paul is the type of person who never met a problem he couldn’t fix. He can always be found tinkering with something in his house, even if it isn’t broken! His tips and tricks are often shared on our site. He’s the one you call when something breaks because he has been known to improvise fixes for everything from leaky faucets to malfunctioning dryers.