Last Updated on February 24, 2023
Knowing how to use a MIG welder correctly is essential from both a safety perspective and your ability to produce the result you are looking for.
The good news is that MIG welding is popular because it’s an easy way to weld pieces of metal together. So, learning how to use one should not pose a problem for most people, and we have several welding tips later on.
Basic Introduction to a MIG Welder
First, a quick introduction to a MIG welder, the name stands for metal inert gas welding, and it uses electricity to weld two pieces of metal together. You may also notice it is referred to as gas metal arc welding, and that’s because some industries changed the name a few years back.
https://twitter.com/hijproductions/status/1388194180594380800
This welding approach is regarded as being quite simple to do, and yet it’s also highly effective at what it does. Also, with little need for too much welding equipment, this type of welding can be done easily at home.
But we do have many points to work through in order to explain how to perform this type of welding, from understanding how the arc is formed to creating the weld, how the electrode acts as the positive and how the machine creates enough heat even to fuse steel.
MIG Welding Uses
MIG welders can be used in many ways, but the common approach is to create a simple weld that transforms a piece of welding wire into that molten state, which can then be used to create the weld.
This sort of welding is used for both DIY use and industrial scale. Its versatility, speed at handling various metals, and its ability to push the wire through the machine with easy speed control also add to its overall functionality.
It’s a welding method that can be used for both thick and thin materials. In fact, MIG welding is better at thicker metals than the other main option known as TIG welding.
MIG Welding and All Position Welding
An advantage of MIG welding is that it is used so widely due to its all-position welding capabilities. It means it can be used with all four of the most common welding positions while it will still generate the correct weld bead no matter the angle.
This versatility is a huge bonus. It allows welders to produce a quality result, no matter how difficult the positions of the welds may be.
All position welding is essential for the welder to maintain positive contact at all times with the torch. It allows for better control over the finished result, while the quality of the work will also not diminish as a result.
The Difference With TIG Welding
TIG welding is known as Tungsten Inert Gas welding, and it uses a different approach to MIG welding. It still creates a weld, but it uses metal rods as the source of the welding joint instead of a wire being fed through an electrode constantly.
TIG welding has various limitations but can be used on more types of metal. With this, the thickness of the metal is key. If it’s too thick, this form of welding cannot produce a strong enough welding joint. The quality of the end product is shaky.
MIG Welding and Metals
Although TIG welding can be used with more metals, let’s look at the materials that work well with MIG welders.
This welder works well with aluminium, stainless steel, carbon steel, and across the size range of sheet metal. Also, as long as scrap metal is created from those options, then there’s no reason why your welds will be inferior in any way.
Do note that this type of welding can also be used on several other forms of metal. However, stainless steel and carbon steel are undoubtedly the most common metals used in this process.
How the MIG Welding Process Works
To keep things simple, we can quickly look at how MIG welding works.
First, you need an electrode and metal you wish to weld, along with a power source. The electrode acts as the positive in this interaction, while the metal is negative. When the power is on, it creates an electrical arc between the two.
This arc leads to a short circuit, and that’s pretty key to this whole process.
Lihat postingan ini di Instagram
It creates heat which, in turn, melts the electrode welding wire in combination with inert shielding gas. A weld bead is then formed from the wire, and it is used to fuse each piece of metal together effectively.
Once the heat is removed from the MIG welding process, the molten metal cools and sets.
So, you have the right material, an electrode acting as the torch, the welding machine, the wire, and welding safety equipment. Oh, and a big enough weld area to do this is also required.
But that’s the basic approach. To get a better result, we need to look at things in a bit more detail.
Safety
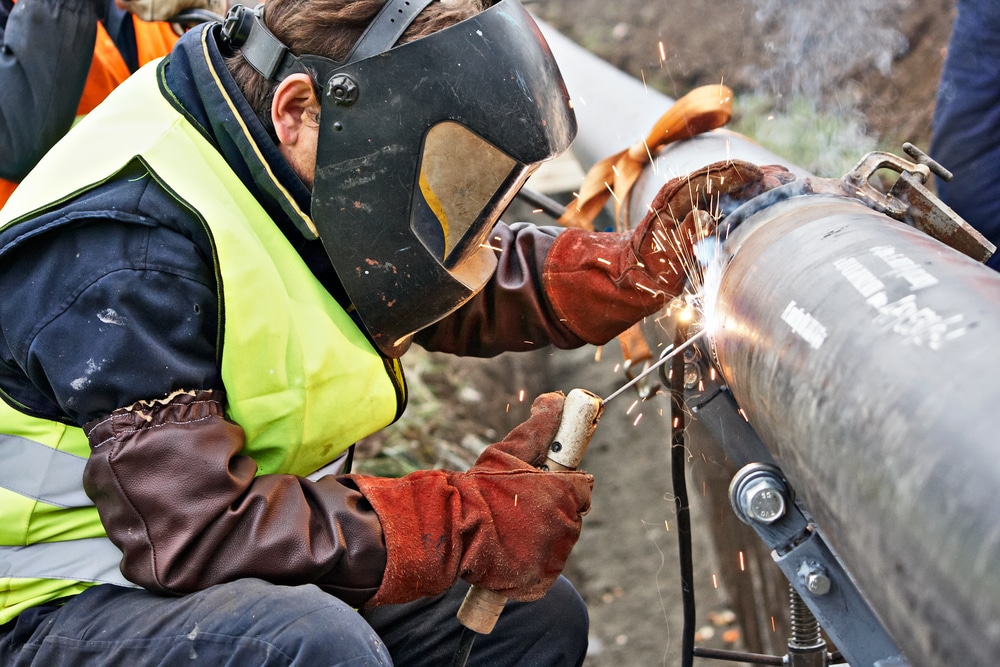
A quick word about welding safety before we proceed: Although MIG welding is generally safe to operate, you should still be aware of the proper protective gear to wear.
You need to wear a welding mask to protect your eyes from the light that’s generated. You should also wear gloves and leather to protect your skin. Sparks will fly up, and that stuff will burn, so you need to be covered to stop this from happening to you.
Finally, wear closed shoes. You don’t want your toes sticking out. Ankle boots are best, and make sure the tops are covered to stop any sparks shooting down inside.
Getting the Correct Gas
You must also think about setting up the correct shielding gas that will be used during the welding. Carbon dioxide can be used, but we don’t recommend using 100% carbon dioxide.
Instead, a mix of argon and carbon dioxide is better. Look for something in the region of 75% argon along with 25% carbon dioxide. It may be slightly more expensive, but it does offer greater control for welders over the gas, making it easier to control the heat aspect.
Setting up for MIG Welding
Next, you need to set up the machine, gun, and metal so it’s ready for use. Let’s begin with the MIG welding machine.
Getting the Machine Prepared
Aside from plugging in the power source to get the voltage running through the machine, you need to look at the valve that allows the shielding gas to flow through. Turn the gas flow valve so it’s allowing somewhere in the region of 20 cubic feet per hour.
The other thing to focus on is that the ground clamp is attached to the welding table or the metal you plan to work on.
The only other aspect to focus on is connected to the settings. For that, we mean the wire speed along with the actual power setting. However, we will look at that shortly.
Preparing the Metal to Be Welded
The metal to be welded must be prepared in advance. The quality of the welds will depend on this preparatory work.
The main thing is to clean the material to be welded. Spend a few minutes getting rid of any grime, as this can inhibit the welding process.
You might also want to grind down the edges of the material to be welded together. Creating a slight slope or angle will allow the weld pool to gather in one spot. It will then create a stronger weld, so it’s an excellent tip to keep in mind.
Now, onto the actual welding.
Lihat postingan ini di Instagram
Steps to Follow on Using a MIG Welder
Step 1: Run a Practice Bead
We do recommend running a practice bead before you go ahead and commit to the weld. Get a piece of scrap, and use this to determine if the wire speed and power setting is at the correct rate. You need to be in control of the whole process.
Step 2: Check Your Settings
The settings are important. If the power is too slow, the weld becomes too splattered, and it becomes weakened. If you set it too high, then the MIG welder will burn through the materials instead of joining them together.
It is why you should use some scrap metal first. It’s all too easy to have incorrect settings on MIG welders, and the results can be a disaster.
Step 3: Making the Bead
Making the bead is simple enough with this type of weld. You want to use the tip of the MIG welder to create the weld pool. You can either go in a Z-shape or go around in circles.
The key here is to lay down the weld bead starting at the top of where you wish to create the join and then slowly work your way to the bottom.
In effect, the tip of the welder is the part that’s going to weld the metals together.
Lihat postingan ini di Instagram
Step 4: Mastering the Bead
We should mention the actual art of mastering the bead. You don’t want a single bead to go beyond an inch or two in length. Anything longer than that is going to cause problems.
A longer bead increases the chances of the weld burning through the materials. Alternatively, the weld can become disjointed and weakened, so that’s something that needs to be avoided.
Step 5: Checking Your Welds
It is a crucial step, but you need to check your welds. This is where you may need to go back to the settings.
The correct settings will result in smooth welds. If you notice they are in short spurts, then either the wire speed or the power is set too low. As we said earlier, if the splatter is too wide and you burn through, then your settings are too high.
Step 6: Creating the Actual Weld
After working on your bead technique, you need to produce the actual weld made by the wire coming through the MIG gun. So, let’s take you through a straightforward butt weld.
Here, you need to fasten down the two pieces to be welded together. Clamp them into place, and then use the tip of the MIG welder to start to fuse things. Begin at the top of the seam and use a sawing motion to work your way down the joint. The gun should move steadily while the wire is continuously fed through the gun.
Step 7: Dealing With a Filler Bump
With a MIG weld, you may end up with what’s known as a filler bump, but it’s not a huge issue. It is where the weld pool comes together in one spot. It doesn’t mean that the spot is weakened, but you do have an option about what to do next.
You can either leave it or grind it down. An individual welder will have a different opinion about how to resolve this, but leaving it alone will often make no difference to the joint.
Step 8: Grinding the Bump Down
If you decide to go for the grinding option on the joint, it’s easy to do. Get an angle grinder, and work at levelling out that bump. Once finished, check the weld to see if there are any issues. You may find that small holes appeared where the tip was perhaps not held down for long enough. If so, go back to an earlier step and repeat the welding process.
And that’s it. It is a simple enough process, but it won’t always run as smoothly as you would have perhaps hoped.
Dealing With Problems
You may come across several problems using the MIG welding method, so let’s quickly examine how to deal with them.
Insufficient Shielding Gas
If there have been insufficient shielding gas levels, it can lead to the weld splattering all these small metal balls once the wire has been heated. The weld may also change colour. To fix this, turn up the gas flow on the MIG welder.
Too Much Metal
If you find that you produce too much metal, it is probably connected to the wire feed speed. If the wire feed speed is too high, then you will burn through more wire leading to it pooling. It is a common issue with the MIG welder, so take control of the wire feed to stop it from happening.
An Inconsistent Weld
An inconsistent weld is often linked to the MIG gun spitting out the weld, and this problem is easy to solve. It’s primarily thanks to you holding the gun too far away. This form of welding does require you to be quite close, so hold the MIG gun closer to the metal, and it should stop the gun from spitting everything out.
Problems With the Wire Feed
There may be times when you encounter problems with the spool of wire. It may develop a kink, which means the wire cannot come through the tip of the gun.
Unplug your MIG welder and look for the blockage. Cut the wire at that point. Use pliers to remove the spool of wire from the hose to clear the block.
Then, refeed the wire so it then emerges from the tip once again. At that point, you are good to go.
The Wire Has Fused to the Actual Tip
Finally, you may discover that the wire has fused to the tip, and that’s another problem that needs to be resolved. Often, you are holding things too close, so you have excessive heat, resulting in the wire fusing in this way.
You can spot this issue as the wire forms a metallic blob on the tip. Due to the wire having still melted, it never stopped making contact with the gun.
To fix it, use pliers to remove the wire blob. It should come off pretty quickly and free up the gun for future use.
Lihat postingan ini di Instagram
Start Welding Your DIY Project
So, even if you are only interested in some DIY welding, then learning how to use a MIG welder could very well be the way forward. Not only is this type of welding gun easy to use, but the ease with which you can change settings on the gun to then control the welds makes it a brilliant option for anyone new to welding.
If you are looking at creating even a basic joint, consider using MIG welding. It takes little time to master the approach, and the results will often surprise you.
Have you used a MIG welder before? Do you have other tips to share with us? Please write in the comments below.
Paul is the type of person who never met a problem he couldn’t fix. He can always be found tinkering with something in his house, even if it isn’t broken! His tips and tricks are often shared on our site. He’s the one you call when something breaks because he has been known to improvise fixes for everything from leaky faucets to malfunctioning dryers.