Last Updated on January 10, 2023
Ironing clothes can be tiresome, especially if you do not know how to use an ironing board properly. If you own an ironing board but are looking for a new way to use it in your home space, we have some guidance on choosing the best one for your needs. You can also find some tips for ironing in the best way, carefully treating different materials, and much more!
How to Use an Ironing Board
Use an ironing board like a professional in your home with our tips below. We’ve focused on the direction and approach you should take to specific items.
Shirt
To iron a shirt:
- Begin the ironing process with the sleeves.
- Open the cuffs, lay one sleeve flat on the ironing board, and iron each sleeve.
- Once you’ve finished both sleeves, move on to the rest of the shirt until the item is crease-less.
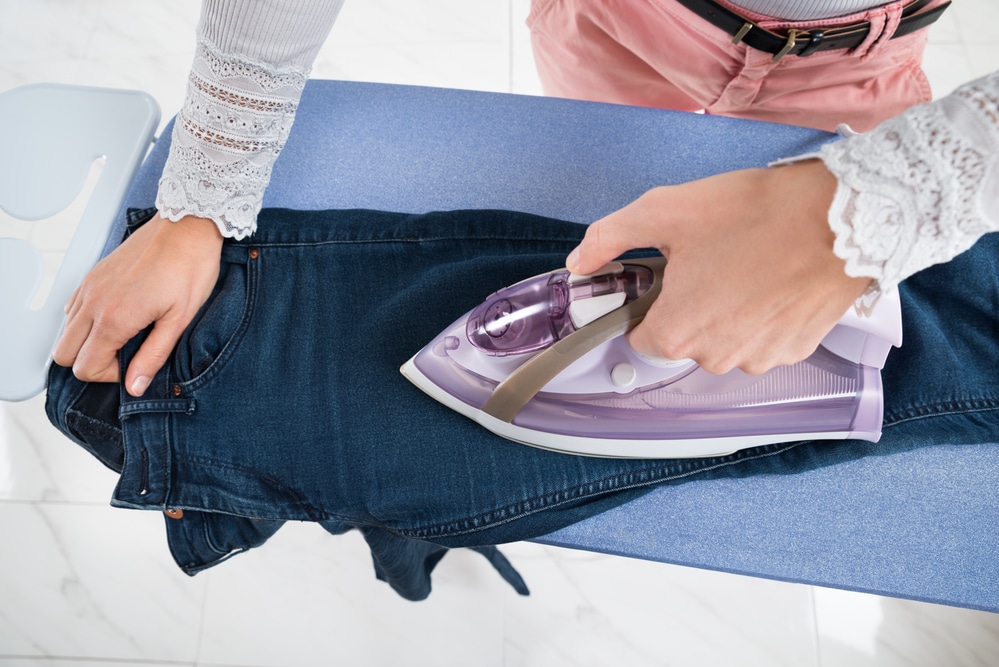
Pants
- Use your ironing board to remove wrinkles out of pants.
- Lay the pants down flat onto the ironing board in a similar way that you’d fold them over a hanger.
- Iron the crease up to six inches below the waist.
- Hang the pants by the waist for an hour to allow the wrinkles to set.
Skirts
Skirts are one of the easiest items to iron—especially if your garment doesn’t have any ruffles.
- Drape the skirt over the ironing board.
- Begin ironing from top to bottom, keeping a lightweight on the iron board to improve stability.
Temperature and Settings Guide for Different Fabrics
Below are some of the most common materials found in clothes and how to care for them when ironing properly.
Cotton
Suppose you are using a hot iron. Iron the clothes when they are slightly damp. It is to prevent any burns or to scald on your shirts. Choose a low-temperature setting first and gradually increase it if necessary.
Linen
Iron your linen items inside out first and then on their right side. It is to enhance their sheen. However, for dark linen items, only iron them inside out.
Silk
For silk clothes, you don’t need to turn them inside out. Iron them directly when they are still slightly damp using a warm (not piping hot) iron.
Wool
You must know how to take care of your clothing made from wool. Turn the clothing inside out and press on the wrong side with a warm iron. Alternatively, you can iron wool clothing by steaming the fabric.
Acrylic
Remember, acrylic is a fragile material and can quickly melt when in contact with a hot iron. Iron the clothing inside out with an excellent (never hot) iron. Don’t use steam or damp clothes, but opt for bone-dry garments when it’s time to iron.
Polyester
Polyester clothes should be nearly dry—iron inside out with a cool iron to prevent damage to the clothing’s surface.
Choosing an Ironing Board Cover
Is it necessary to have a cover for your ironing board? Yes. The primary purpose of a cover is to protect your ironing board from the heat caused by the iron. For the best results, choose a fabric that reflects heat, so your board isn’t directly exposed to the heat.
Size
The most important thing to check is the cover’s size. It should fit your ironing board snuggly. If it’s too tight, it won’t cover the entire top for maximum protection. And if it’s too large, it’ll wrinkle up, preventing a flat layer for when you iron.
Fortunately, most covers come in different designs to fit ironing boards within a range of sizes. So check the length and width of your ironing board before making a purchase. Some of the best covers feature a fastening mechanism that lets you fit it securely and neatly to the ironing board.
Fabric
Next, it’s time to choose the correct fabric for your ironing board’s cover. Cotton, a resilient fabric that creates a smooth, flat surface, helps with creases. For the best fabric, look for reflective materials, such as a metallic layer. It helps with ironing clothes by protecting the board’s durability from a hot iron.
Protection and Padding
Ideally, look for foam padding underneath to provide a smooth layer when you are ironing pants. Thick padding will also further protect the ironing board from heat damage.
How to Choose an Ironing Board
Now that you know how to use an ironing board, it is time to consider some essential factors to consider before buying one for your home.
Sturdiness
The last thing you want when you’re ironing is for the ironing board to wobble. It can be extremely dangerous when handling an iron or placing it onto the board. However, a durable ironing board will improve safety by providing a sturdy place for your iron garments. Moreover, if you have pets and children, it’s even more important to choose a sturdy design.
Height
Next, consider the height. Most ironing boards range from 28 to 36 inches, which provides a flexible height range, making them ideal to use amongst several people.
This range is possible due to a height mechanism installing the ironing board, so you can make the board lower or higher to suit your needs. It is also ideal for switching between standing and sitting when ironing, making the ironing board highly versatile.
If you prefer to stand up when ironing, set the height to your hip level. It is essential for maintaining a healthy posture while you iron.
Length
Not everyone will need an ironing board of the same length. If you only tend to iron small garments, such as skirts and t-shirts for children, opt for a small size, so you don’t require ample storage space. Alternatively, larger ironing boards are best for more oversized items, such as bedding, trousers and more.
You can also choose an iron board with an extendable area, great for versatility and mixing between smaller and larger clothing items.
How to Open an Ironing Board
Opening an ironing board is quick and easy. Here are the steps:
- First, you’ll need to place your ironing board in the chosen area where you’ll be ironing.
- Then, take the board with two hands; put one of the levers and the other on the opposite end. Ensure that there are no delicate ornaments around.
- Press and hold the lever while you attempt to lift the board as it rises. You’ll need to guide and push the board upwards gently, but this shouldn’t require too much effort.
- Once you’ve done this, the ironing board should be upright and ready to use.
Making Height Adjustments
If you need to tailor the ironing board’s height to suit you, continue holding the lever while you’re lifting the board so it reaches the desired size for you. At this point, consider if you will be sitting down or standing up when ironing. To lower the board, use the same button and gently push down on the board to bring it lower.
The Different Types of Ironing Boards
There are several types of ironing boards, each of which has its benefits. Below are some of the common types of ironing boards and their features.
Built-in Ironing Boards
These ironing boards provide an excellent convenience for storage as you can keep it out of sight. They are also easy to install as they can be studded to the wall. They’re available with or without padded covers, and they come with accessories, such as a hanging rack or iron plate.
Compact Ironing Boards
These ironing boards don’t have many options to adjust the height. They are typically small, making them ideal for ironing small items. They are also a great choice if you have small floor space.
However, there are many ways to use a compact board. One example is by placing it on top of a freestanding board to raise its height.
Alternatively, place a compact board on a wood area to maintain housekeeping without the hassle of getting out and setting up an ironing board.
Freestanding Ironing Boards
It is the most popular type of board to use. It is equipped with metal construction and a height-adjustable mechanism. These features allow you to adjust between sitting and standing or sharing amongst different people.
A freestanding board provides a flat, smooth surface and works particularly well with a steam iron. The steam from an iron penetrates the board’s pad and can travel through to the metal mesh base.
Tips to Iron like a Professional
Remove creases from your garment like a professional with these ironing tips:
Iron Correctly
Perhaps the best tip we can provide is to use your iron correctly. Never conduct this household chore by wiggling the iron around too much since this can contribute to stretching your garment.
Instead, use the iron with long, straight strokes to prevent damage to the fabric while removing any wrinkles on your shirt. Furthermore, be aware of buttons, and intricate detailing (such as embellishments) as this can result in permanent damage if not ironed correctly.
Boil Water Beforehand
Most people use tap water in the iron, which is completely fine. However, we recommend boiling tap water before pouring it into the iron.
It is essential to have hard water in your area and clean, soft water to prevent your iron from getting blocked up.
Once your iron becomes blocked up, it can encounter reduced efficiency and create stains on your clothing. Prevent these issues from happening in the first place by caring for your iron at home.
Hang Up Ironed Clothes Immediately
Keep your clothing free from creases by immediately hanging them up once you’ve ironed them. Alternatively, fold them on a flat area straight away and put them aside. You’ve spent a long time ironing items, so don’t let this effort go to waste by scrunching up garments or throwing them to one side.
Iron From Cool to Hot
As we mentioned earlier, some fabrics require a cooler temperature than other fabrics. It is better to separate your items into several types before you iron. It will only take a couple of minutes and could save you iron marks, creases, and more.
Once you’ve done this, start ironing the delicate items using a low temperature and continue to work your way up to something that requires a hotter temperature. This process makes a lot more sense than going from hot to cold and waiting for the iron to cool down in-between.
Create Your Solution to Use in a Spray Bottle
An effective way of improving efficiency and removing creases from clothing is to create your ironing mixture. These are ironing spray bottles available to buy in shops, but you’ll save money by making your own.
How to make your solution:
- Mix white vinegar and water (using equal parts of both liquids).
- Then, follow up by ironing over the area, and you’ll see the creases melt away before your eyes.
- Spritz a small amount of the solution onto your top, pants, and more at first; you can always continue with another spritz.
Ironing It All Out
No matter how many times you’ve ironed in the past, it’s good to refresh how to use an ironing board and discover ways to improve your attention to detail when ironing.
What iron boards have you owned in the past? Which has been the best one in the end? Do you have other ironing tips you’d like to share? Let us what’s on your mind in the comment box below!
Amy is a U.K.-based writer and editor with a penchant for helping consumers find the best home products for their needs, as well as providing easily digestible guides for living better at home. Her dedication to her work means she can usually be found elbow-deep in research or hunting down samples of the latest and greatest on behalf of her readers.
An avid DIYer herself, Amy’s passion lies in teaching others how they too can achieve their dream homes by tackling some of those pesky projects themselves! Whether it’s building furniture from scratch or turning an old dresser into a coffee table, Amy is always happy to share what she knows about making your house feel like home without spending a fortune.
My next to latest iron was only 3 weeks old when I had to clean it. (We have incredibly hard water here). I now only use distilled water in my iron.