Last Updated on January 10, 2023
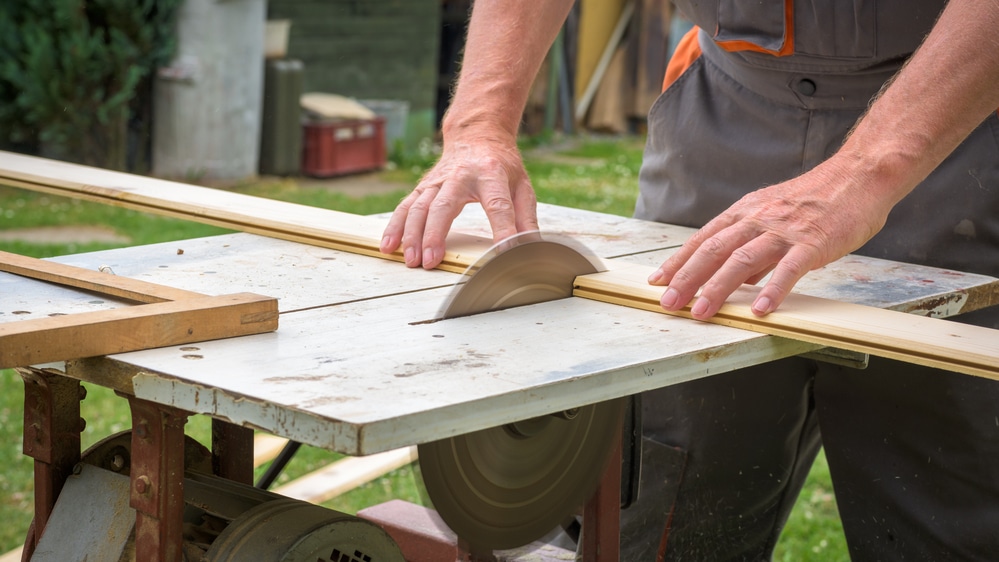
A table saw is a crucial tool that helps you cut different sizes of wooden planks. With the right tools, you can easily build a table saw that would make it easier for you to work on different projects. Not to mention, homemade table saws are much cheaper than the ones that are purchased at a store. Various things can be used to build a table saw, making this woodwork project quite versatile.
Homemade table saws also have different designs that take the accuracy of the blade to a whole new level. In this post, we are going to show you how to make a table saw.
Steps to Follow While Building a Table Saw
Step 1: Make Holes on the Base of Your Circular Saw
Start by drilling holes on the base of your circular saw. Such holes can be used to mount the saw to the table that you are going to be using. Drill at least four different holes at different sections of the saw blade. Once you finish drilling holes, clean the holes, and the circular saw.
Step 2: Determine the Place That You Are Going to Fix the Saw
You can use any type of wood to create a table for the saw. However, you need something sturdy and strong. Examples of such wooden materials include laminated boards, melamine, and birch plywood. For instance, you can use the same material used to make a cabinet in this project. The surface of the wooden material should have considerable dimensions that will provide you with enough space to work on different projects.
For instance, a thick piece of plywood that is 60cm wide and 90 cm long can be a suitable table for fitting different wooden planks. Well, you can change the dimensions of the table based on your preferences. However, you have to make sure that the table is big enough to handle planks of different sizes.
Once you find the material that you are going to use, place your circular saw on the centre of the table. Trace the outline of the circular saw on the plywood with a pencil. Sketch the spots where you are going to locate your holes on the bottom part of the table.
Step 3: Drill Pilot Holes From the Bottom
The next thing that you need to do is to drill pilot holes on the wooden surface. Drill some holes on the outline that you had made earlier on. Such holes make it easier for you to fit your saw to the wooden surface easily.
Step 4: Make a Cut on the Wooden Surface
Cut the plywood using the circular saw. Connect the circular saw to a power source. Place it on the outline that you had marked earlier on. Make sure that the blade comes into contact with the plywood at a 90° angle. If the saw is titled, it will cut through the plywood at a certain angle on the front side of your table. Not to mention, it might not be accurate in making 90° cross cuts on wooden planks.
Press the trigger of the circular saw, then cut through the plywood until the blade appears on the front side of the table. Continue cutting to increase the size of the gap.
Step 5: Mark Straight Lines on the Plywood
The next thing that you need to do is to make the base for the wooden saw. To get a sturdy base, you have to install two wooden beams under the plywood on each side.
Start off by marking straight lines along the width of the plywood; the lines should be 10-15cm from the edge of the surface. Draw lines on the plywood with a pencil and a carpenter square.
After that, mark the points that you’re going to drill through. Mark at least four different points and space them out at the same intervals.
Step 6: Drill Pilot Holes
Drill pilot holes in the points that you had marked earlier on. Such holes can guide you as you are fastening to hold the beams.
View this post on Instagram
Step 7: Fix the Beams on the Plywood
Put a beam under the section that you had marked earlier on. Fix with one beam first. The line should act as a centerline. Once you fix it in the right spot, fasten screws into the beam with a drill.
Repeat the same procedure on the other side of the plywood.
Step 8: Make the Legs of the Table With Wooden Panels
You can make legs from wooden panels. Just cut two wooden panels. The width of the wooden panel should have the same measurement as the width of the table.
Take the wooden panel and place it against the wooden beam. Secure it in one position with handheld clamps. Drill some pilot holes on the joint where the panel comes into contact with the beam. Such holes will be used to attach the wooden panel to the beam.
Repeat the same procedure on the other beam.
After that, secure the legs to the wooden beams. Place a wooden plank between the two panels, then drill some screws to hold it into position. The extra wooden plank will act as extra support and minimize movements.
Step 9: Install a Switch

Since a circular saw comes with a trigger that activates the rotary motion of the saw, you have to install a switch on your homemade table saw. Tie the trigger of the circular saw with a cable tie. After that, drill some pilot holes on one of the panel legs. Place an extension cord on one of the panel legs. Pass cable ties through the pilot holes and secure the extension cable to the panel leg with the cable ties. Connect the power cord of the circular saw to a socket on the extension cord.
Connect the extension cord to a power source. To start the table saw, you just have to flip the switch that is found on the extension cable. Since you have used a cable to tie the trigger of the circular saw, the blade will start rotating as soon as you flip the switch on the extension cord.
If your blade doesn’t move when you start the power, you have to countercheck the setup, then fix the problem.
Steps on Creating a Fence
These are some of the tools that you might need to create a table saw fence:
- Four pieces of 1″ x 3″ wooden planks.
- One piece of 1″ x 2″ wooden block.
- A piece of 2″ x 2″ wooden block.
- A knob.
- A T track and different T track screws.
- Some T nuts.
Step 1: Cut the Wooden Planks
Start off by cutting the 1″ x 3″ wooden planks. The wooden planks should run along the width of the table saw. The length of the wooden plank should be the same as the width of your table saw. Measure one plank and mark the place that you are going to cut it. Use a hand saw to cut the plank. Repeat the same procedure on all the other planks.
Step 2: Install the T Track on the Table
A T track is a special tool that can be used to make the fence slide along with the table. You can purchase it, then cut it until it fits on the side of your table saw.
To install a T track, place it along the longer side of your table saw, then mark the points that you are planning to cut. It should have the same length as your table saw. Cut the sides of the T track to get the same dimensions as the edge of the table saw.
After that, secure the T track on the edge of your table saw with some screws. Drill the screws into the thickness of the table. You can also use a router to drill to trim the edge of the table saw. However, this is an optional step.
Step 3: Build the Fence

Once you finish attaching the track to the table, take two pieces of wood, then join the long edges at a 90-degrees angle.
Place one plank of wood on a flat plane in a horizontal position, then place another piece of wood on the side of the first plank of wood. The edges of the two pieces of wood should meet at a 90-degrees angle. Use quick grip clamps to hold one piece of wood at a vertical angle. Fasten some screws on the 90-degrees joint that is formed by the edges of the two planks.
Place another wooden plank on the other edge of the wooden plank, just as you had done earlier on. Clamp the plank at a vertical angle, then drive the screws into the 90 degrees joint.
Place some wooden scraps in between the vertical planks for extra support. Secure the blocks in one position with screws.
Use a block to create the sliding part of the fence. Place a piece of wood on the T track, then use a T-screw to test whether it slides perfectly on the T-track. Drill two holes on the piece of block, then fasten the T screws into those holes. Insert the wooden block into the T-track through the T screws.
If it slides perfectly, clamp the fence and the sliding block, then join the two pieces with screws. You can always insert or remove the sliding part from the T Track while working on different projects.
Make a Table Saw for Your Woodwork Projects
When you know how to make a table saw, you can easily work on a lot of woodwork projects. However, you have to build it from something that is strong and sturdy. Join all the parts together, then test whether it cuts smoothly or not. You can also add a dust collection mechanism to your table saw by making a small box with some scrap wood.
Would you like to make your won table saw? Tell us about it below.

Ian loves everything that revolves around the home improvement niche. He loves trying out new home appliances. He has also handled a lot of equipment and has a lot of insight. Plus, he’s worked on various home improvement projects that became a success. If Ian isn’t busy working on his latest project, you can find him reading up about another one!