Last Updated on February 10, 2023
It is an all too common problem for many home sewers: “why is my sewing machine skipping stitches?” If you’ve ever experienced this, then you know how frustrating it can be. But don’t worry – there are ways to fix the issue and prevent future problems from occurring. In this blog post, I’m going to discuss what causes sewing machines to skip stitches, how to adjust thread tension correctly, choosing the right needle size for your project, and setting the correct stitch length. So if my sewing machine has been skipping stitches lately or if yours is giving you trouble now – keep reading.
Table of Contents:
- What Causes Sewing Machines to Skip Stitches?
- How to Adjust Thread Tension
- Choosing the Right Needle Size
- Setting the Correct Stitch Length
- FAQs in Relation to Why is My Sewing Machine Skipping Stitches
- Conclusion
What Causes Sewing Machines to Skip Stitches?
Sewing machines are an invaluable tool for any home sewer, but they can be prone to skipping stitches. This is a common problem that many sewers experience, and it’s important to understand what causes it so you can prevent or fix the issue.
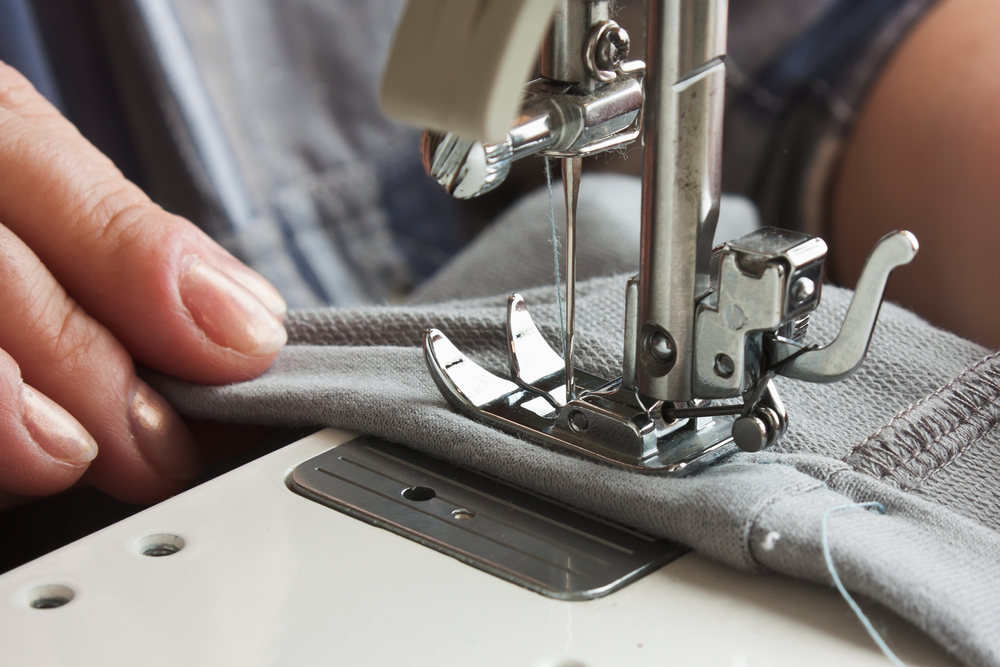
The most common cause of skipped stitches is incorrect thread tension. If your machine’s tension isn’t set correctly, the needle won’t be able to pull the thread through properly and will skip over some of the fabric instead. To adjust your machine’s tension, refer to your sewing machine manual or consult with a professional seamstress if necessary.
Incorrect needle size is another frequent culprit when it comes to skipped stitches. The wrong size needle may not fit through the fabric properly or may not have enough space between its eye and point for proper stitching. Make sure you choose needles that are appropriate for both your fabric type and weight, as well as the stitch length setting on your machine, before starting a project.

Finally, incorrect stitch length settings can also lead to skipped stitches on a sewing machine. If you select too long of a stitch length setting, then there won’t be enough time for the feed dogs (the teeth-like parts underneath) in order for them to move forward far enough before the next stitch begins; this results in missed loops which lead to skipped stitches overall. Selecting shorter lengths should help alleviate this issue – just make sure that whatever length you choose still allows room for movement from one looped section onto another without pulling tight against either side too much.
The most common cause of skipped stitches is incorrect thread tension, so it’s important to learn how to adjust the tension for optimal results. Let’s take a look at how to do this in the next section.
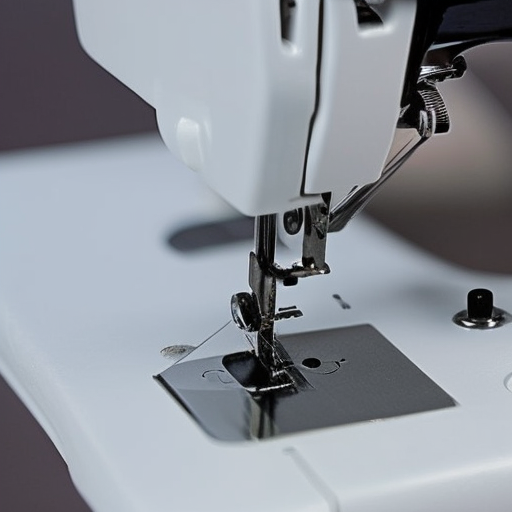
How to Adjust Thread Tension
Adjusting the thread tension on a sewing machine is essential for achieving even and consistent stitches. If the tension is too tight, it can cause puckering or breaking of threads; if it’s too loose, you may get loopy or skipped stitches. Here are some steps to help you adjust your thread tension:
1. Start by checking the upper threading path of your machine to make sure that all parts are threaded correctly and that there aren’t any snags or tangles in the thread.
2. Next, check the bobbin case for proper installation and alignment with its corresponding slot in the machine head. Make sure that it turns freely when pushed down into place as well as when pulled back out again – this will ensure smooth operation during stitching.
3. Now test your stitch quality by running a few lines of stitching on scrap fabric before adjusting anything else – this will give you an idea of where to start so that you don’t over-adjust either way (too tight or too loose). Look closely at each stitch to see if they look even across both sides of the fabric without any loops forming along one side only – if not, then proceed with adjustment accordingly.
4. To increase tension (for tighter stitches), turn clockwise using small increments until desired results are achieved – be careful not to go overboard here, though. Conversely, turning counterclockwise will decrease tension (for looser stitches), but again, use caution here since going too far could lead to skipped/broken threads altogether which would require rethreading everything from scratch… yikes.
5. Once satisfied with adjustments made thus far, run another line of stitching on scrap fabric just like before and compare results against the initial test sample – if still not quite right, then repeat the process until the desired outcome is reached. This might take several attempts depending on how much adjustment needs to be done so patience is key here.
Adjusting the thread tension correctly can help ensure that your stitches are even and secure. However, it is also important to make sure you choose the right needle size for your fabric type in order to prevent skipped stitches.
Choosing the Right Needle Size
Using the right needle size for your fabric type is essential to successful sewing. A needle that’s too large can cause skipped stitches, puckering and even damage to the fabric itself. On the other hand, a needle that’s too small won’t penetrate thick fabrics like denim or leather. So how do you know which one to choose?
The first step is understanding what each number on a needle package means. Needles are labelled with two numbers: The first indicates its size, while the second denotes its shape or point type (e.g., 70/10). Generally speaking, needles come in sizes ranging from 8-18; larger numbers indicate larger needles and vice versa. As far as points go, there are three main types: sharp (for woven fabrics), ballpoint (for knits) and universal (a combination of both).
Once you understand these basics, it becomes easier to select an appropriate needle for your project. For instance, if you plan on sewing lightweight cotton voile or silk chiffon, then opt for a smaller size, such as 60/8 or 65/9, with a sharp point – this will help prevent any accidental snags in delicate fabrics like these. Similarly, if you want to sew through thicker materials like canvas or upholstery weight fabrics then use something bigger such as 80/12 with either a sharp point or universal depending on whether it’s woven or knit respectively.
Lastly, don’t forget about thread tension when using heavier duty needles; higher tensions might be needed to ensure proper stitch formation without skipping stitches along the way.
When it comes to choosing the right needle size for your sewing machine, make sure you select one that is suitable for the fabric and thread you are using. Next, we’ll look at how to set the correct stitch length for a perfect finish.
Setting the Correct Stitch Length
Setting the correct stitch length on a sewing machine is essential for achieving professional-looking results. The wrong stitch length can cause puckering, bunching, and other problems that ruin your project. To ensure you get the best possible outcome, here’s how to set the right stitch length:
First, check your sewing machine manual to determine what settings are available. Most machines have several options ranging from very short stitches (1mm) to long ones (4mm). Select the one that works best for your fabric type and desired look.
Next, adjust the tension dial according to your manual’s instructions. This will help keep stitches even and prevent them from becoming too loose or tight as you sew. Make sure you test out different tensions before starting a project, so you know which setting works best with each fabric type.
Finally, use a scrap piece of fabric to practice stitching at different lengths until you find one that looks good with your chosen material. Start by making small adjustments in 0.5 mm increments until it looks just right – not too loose or tight. If necessary, make further adjustments until all seams look neat and uniform when sewn together correctly, with even tension throughout the entire seam line.
Now that everything is set up properly, you’re ready to start creating beautiful projects. Remember, practice makes perfect. With enough patience and experimentation, you’ll soon be able to create stunning garments without any issues related to incorrect stitch lengths.
FAQs in Relation to Why is My Sewing Machine Skipping Stitches
What is the most common cause of skipped stitches?
Skipped stitches are most commonly caused by incorrect thread tension. If the upper thread is too tight, it can cause the needle to skip over the fabric as it passes through. Similarly, if the lower thread is too loose, it can also lead to skipped stitches. It’s important to adjust both threads until they are balanced and not overly tight or loose for optimal stitching results. Additionally, using a sharp needle that’s appropriate for your fabric type will help reduce skipped stitches.
Why is my sewing machine skipping stitches on thick fabric?
Skipping stitches on thick fabric can be caused by a few different factors. Firstly, the needle may not be suitable for the thickness of the fabric you are using – check that it is an appropriate size and type for your project. Secondly, ensure that your machine’s tension settings are correct; if they’re too tight or too loose, this could cause skipped stitches. Finally, make sure the presser foot pressure is set correctly – this should allow the feed dogs to move freely and prevent skipping stitches. If all else fails, consult your sewing machine manual or take it to a professional service centre for further assistance.
Conclusion
In conclusion, if your sewing machine is skipping stitches, it could be due to a variety of factors. From adjusting the thread tension, choosing the right needle size and setting the correct stitch length, there are many ways to help prevent my sewing machine from skipping stitches. With these tips in mind, you can get back to creating beautiful projects with ease.
Paul is the type of person who never met a problem he couldn’t fix. He can always be found tinkering with something in his house, even if it isn’t broken! His tips and tricks are often shared on our site. He’s the one you call when something breaks because he has been known to improvise fixes for everything from leaky faucets to malfunctioning dryers.